POP Color
Directions
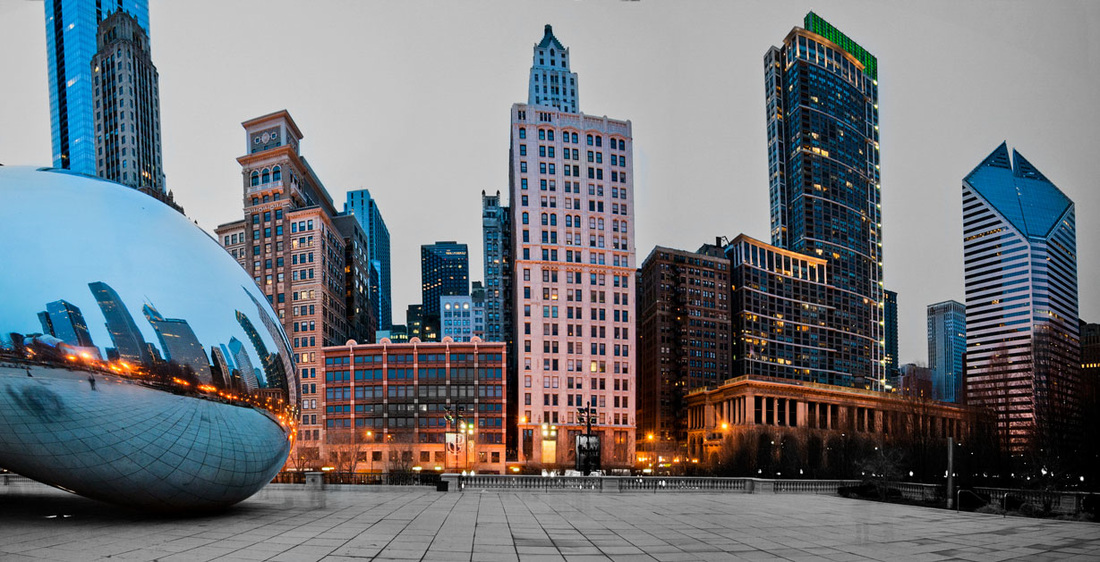
Select a colorful photograph from our field trip to Chicago and select one or two colors from the photo that will remain. The color area should be a strong focal point in the image. The rest of the photograph will stay black & white like the example above.
Select a colorful photograph from our field trip to Chicago and select one or two colors from the photo that will remain. The color area should be a strong focal point in the image. The rest of the photograph will stay black & white like the example above.
Step 1
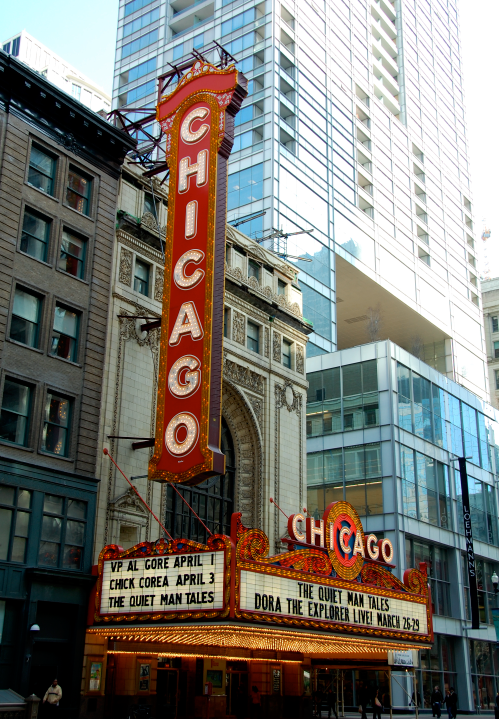
Open Photoshop, and the open up a photo from our field trip to Chicago you already have saved.
NOTE: If you did not go the field trip to Chicago, photos must be taken from the Advanced Search on Flickr - Search: Chicago
Open Photoshop, and the open up a photo from our field trip to Chicago you already have saved.
NOTE: If you did not go the field trip to Chicago, photos must be taken from the Advanced Search on Flickr - Search: Chicago
Step 2
Press Ctrl + J to copy your image.
Press Ctrl + J to copy your image.
Step 3
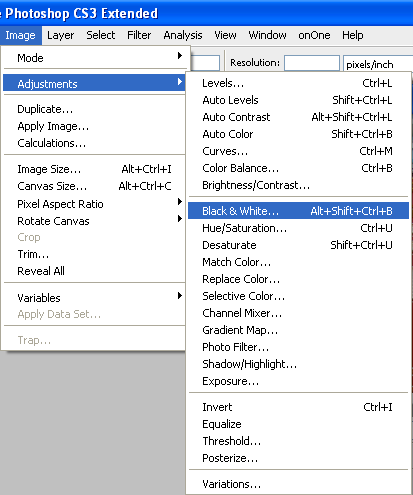
Make a Black & White version of this layer by using an Adjustment Layer. Use the Black & White command (Image Adjustments > Black & White). Use different color sliders to mix a grayscale image.
Make a Black & White version of this layer by using an Adjustment Layer. Use the Black & White command (Image Adjustments > Black & White). Use different color sliders to mix a grayscale image.
Step 4
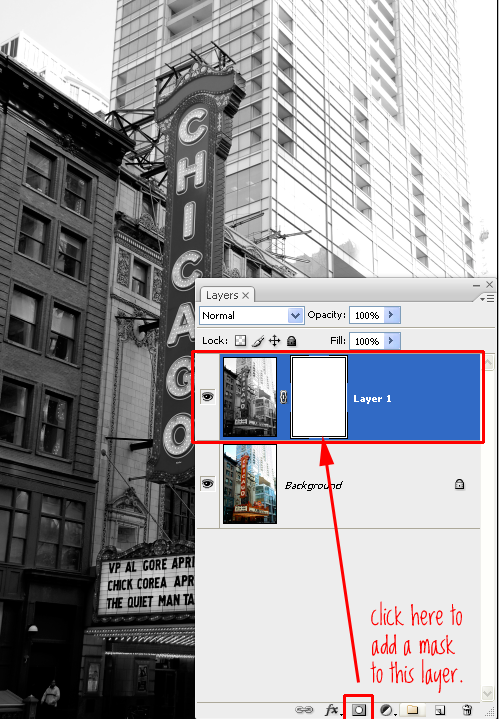
Add a Layer Mask to the Black & White version. Click on the top image (B&W image layer) and click the add layer mask icon
Add a Layer Mask to the Black & White version. Click on the top image (B&W image layer) and click the add layer mask icon
Step 5
Using the Bush tool, and black as your selected color, begin to paint away the area where you want to bring back color into the image on the Mask. Change brush sizes and zoom in to do this very neatly. Use white as your color if you make a mistake and want to paint the grayscale image back.
Using the Bush tool, and black as your selected color, begin to paint away the area where you want to bring back color into the image on the Mask. Change brush sizes and zoom in to do this very neatly. Use white as your color if you make a mistake and want to paint the grayscale image back.
Step 6
Add more saturation to your color image by going to Image > adjustments > Hue/Saturation and add about a +10 or +20 amount to your image. This will increase the color and make it more vivid against the grayscale image.
Add more saturation to your color image by going to Image > adjustments > Hue/Saturation and add about a +10 or +20 amount to your image. This will increase the color and make it more vivid against the grayscale image.
Step 7
Save this completed image as: PopColor.psd to your Google Drive.
Save a copy as a JPG file > PopColor.jpg
Turn in the PopColor.psd file and the PopColor.psd into Google Classroom.
WORTH 100 Points
Save this completed image as: PopColor.psd to your Google Drive.
Save a copy as a JPG file > PopColor.jpg
Turn in the PopColor.psd file and the PopColor.psd into Google Classroom.
WORTH 100 Points
