This is the INDEX page that is reserved for Weebly system use ONLY!
This page is automatically assigned by Weeby for Single Product Page, Checkout Page, and search result page
DO NOT USE THIS PAGE
Ink Splatter Image

Directions
Combine two or three images together inside an image of an ink splattered on paper. Black and white photos only work but color images can be used. Play with scale and textures in developing your image. Masking away parts you don't want visible, and using the Layer Blend Modes of Lighten, Screen, Overlay, and others are good ways to blend away the edges of your images into the ink splattered edges.
Art & Design skills used in this lesson Shape (positive and negative)
Step 1
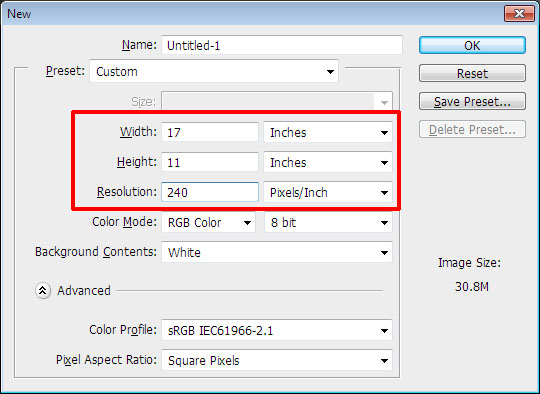
Create a new document in Photoshop that is 17 x 11 inches with a resolution of 240 ppi
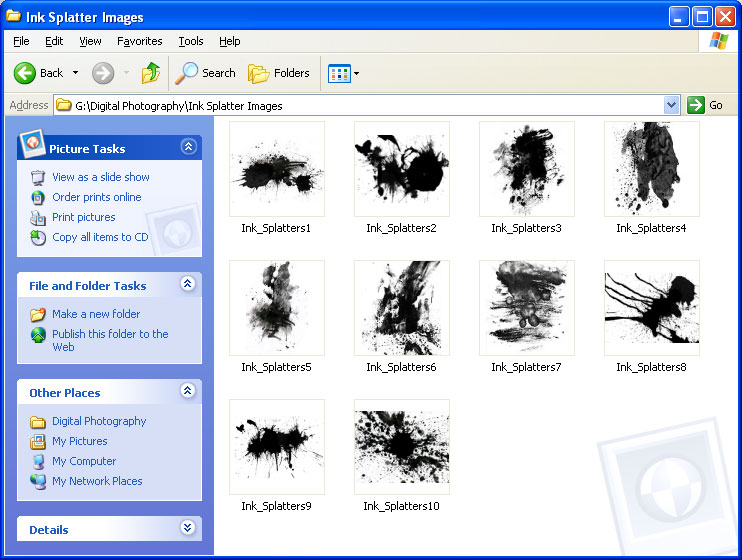
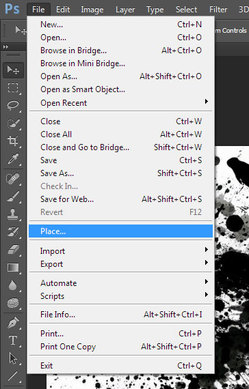
Place (File > Place) one of these Ink Splatter Images inside to begin. Adjust the size larger by dragging on a corner point to the desired size. Hit the Enter key on the keyboard when you get the photo the way you want it.
The Ink Splatter Images can be found on the Graphics (G:) drive > Digital Photography > Ink Splatters folder.
Create a new document in Photoshop that is 17 x 11 inches with a resolution of 240 ppi
Place (File > Place) one of these Ink Splatter Images inside to begin. Adjust the size larger by dragging on a corner point to the desired size. Hit the Enter key on the keyboard when you get the photo the way you want it.
The Ink Splatter Images can be found on the Graphics (G:) drive > Digital Photography > Ink Splatters folder.
|
|
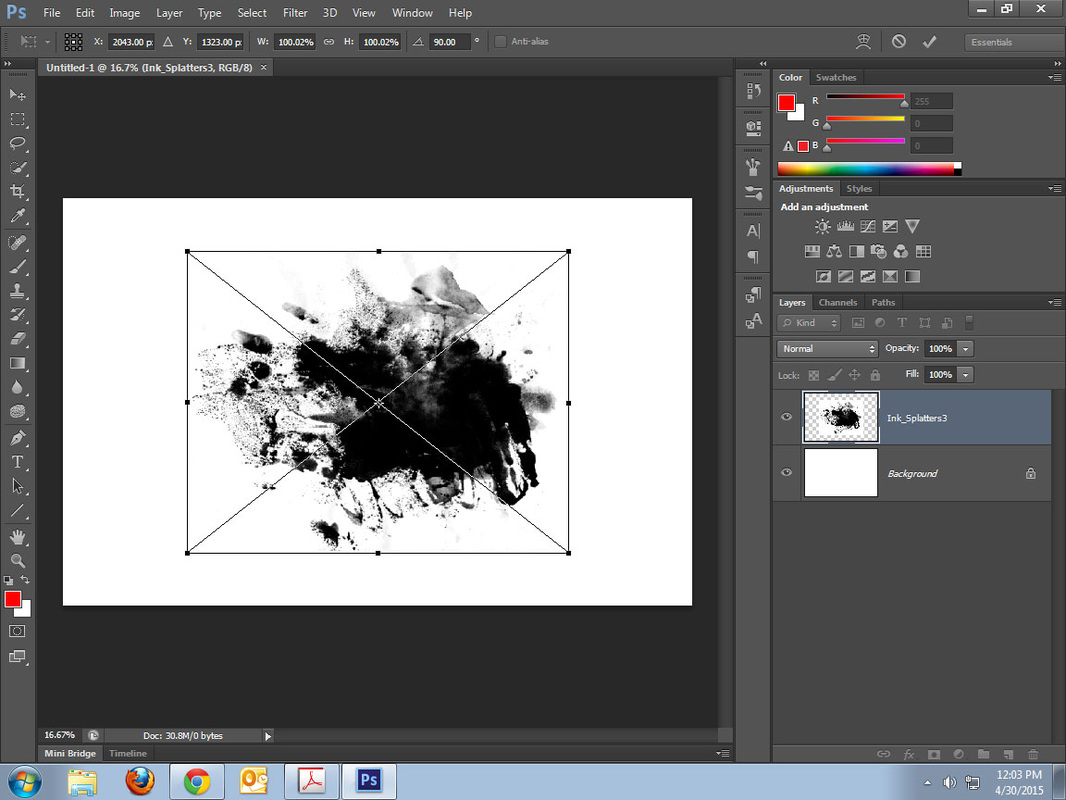
Rotate the image if you want to more ink splatters (file > Place) to make it larger and give more room to see the images you will add to this later.
Step 2
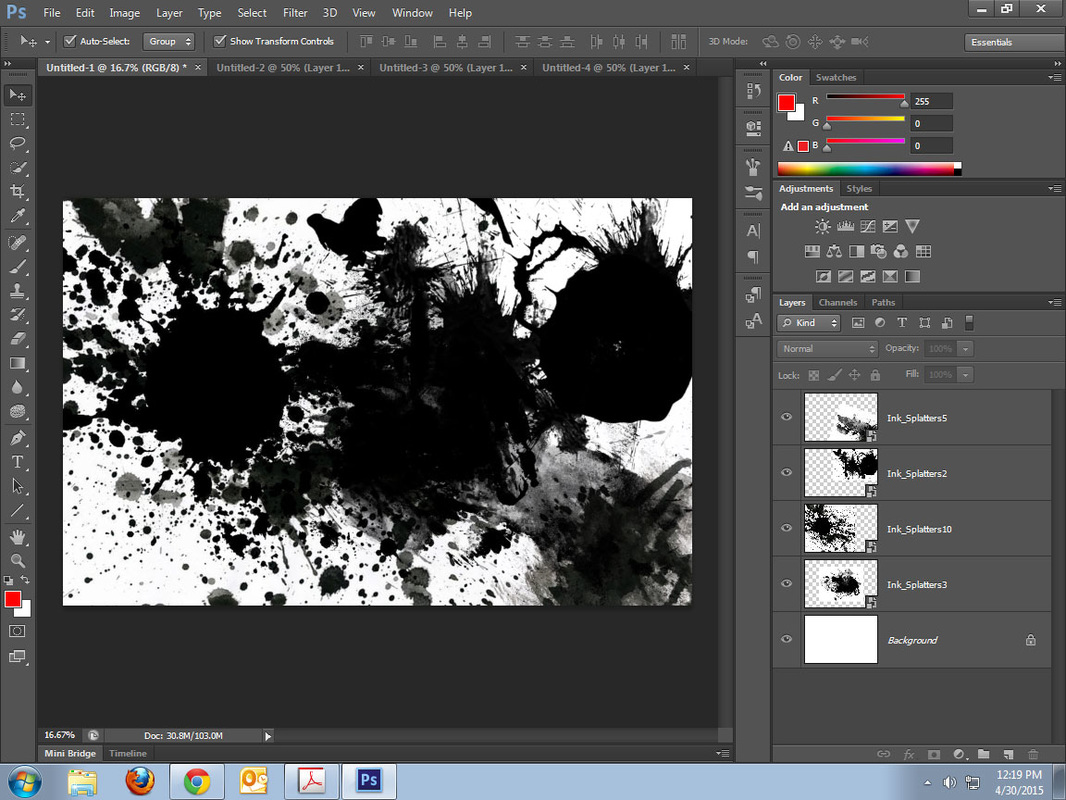
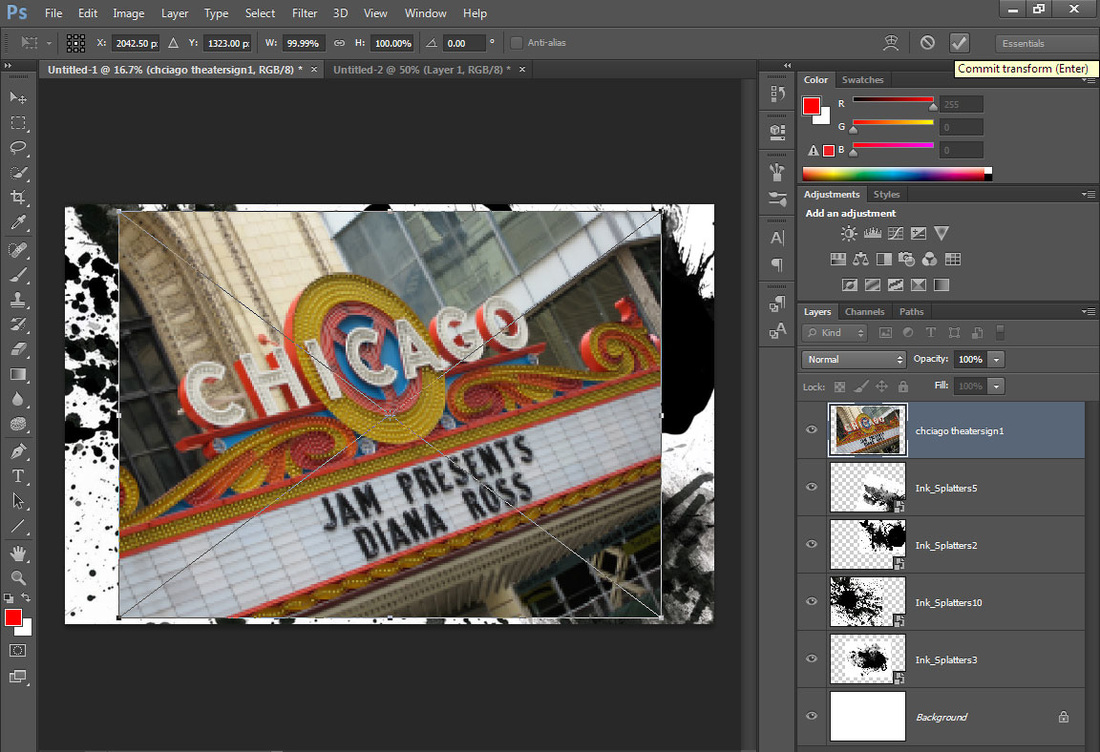
When you have added multiple ink splatters images change the Layer blending mode to Multiply.
Each layer can be adjusted and moved still to change the way they look together.
When you have added multiple ink splatters images change the Layer blending mode to Multiply.
Each layer can be adjusted and moved still to change the way they look together.
Step 3
Then find other images you have taken during this class (portraits, macro, Chicago field trip, etc.) and Place (File > Place) them above the ink splatter photos.
Then find other images you have taken during this class (portraits, macro, Chicago field trip, etc.) and Place (File > Place) them above the ink splatter photos.
|
|
Step 4
Use different techniques we have done the entire semester in Photoshop like - Layer Masking, Adjustment Layers, Filters and Layer Blend Modes.
Use different techniques we have done the entire semester in Photoshop like - Layer Masking, Adjustment Layers, Filters and Layer Blend Modes.

Step 5
Save this to your Google drive folder as InkSplatterImage.psd
Save a copy of the finished project as a JPG file. InkSplatterImage.JPG
Then turn in BOTH the PSD and JPG files into Google Classroom for grading
WORTH 100 Points
Save this to your Google drive folder as InkSplatterImage.psd
Save a copy of the finished project as a JPG file. InkSplatterImage.JPG
Then turn in BOTH the PSD and JPG files into Google Classroom for grading
WORTH 100 Points
