Hockney Photocubism
|
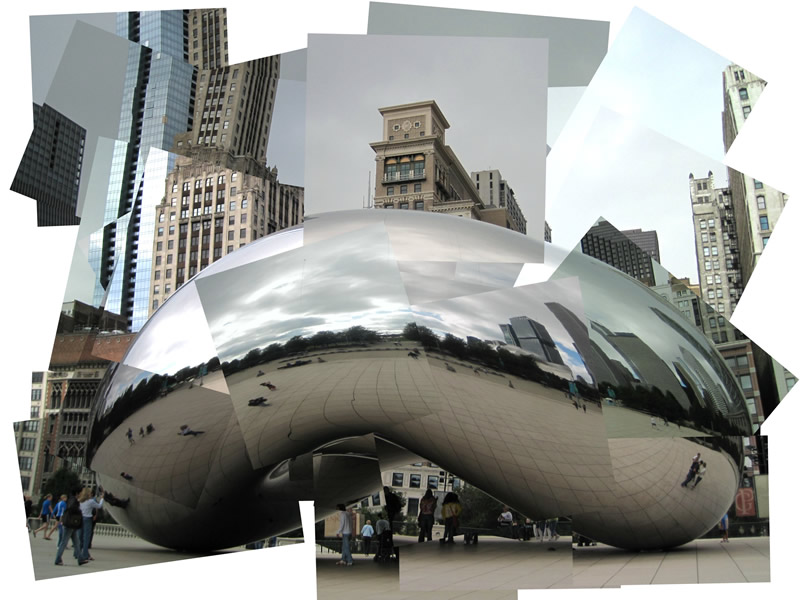
David Hockney is associated with the unique landscape subject matter and sun-drenched color palette he devised in Los Angeles, where he lived and worked from 1963 to 2005. He first achieved international renown in the early 1960s for his drawing, printmaking, and painting, which were associated with the Pop Art movement that derived its subject matter and name from references to popular culture.
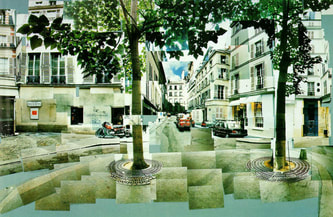
In the early 1980s, Hockney began to produce photocollages, which he called "joiners," first of Polaroid prints and later of 35mm, commercially processed color prints. His subject matter ranges from portraiture to still life, his style from representation to abstraction. |
Directions
Create your own David Hockney style photocollage with a photo from the city of Chicago.
Create your own David Hockney style photocollage with a photo from the city of Chicago.
Step 1
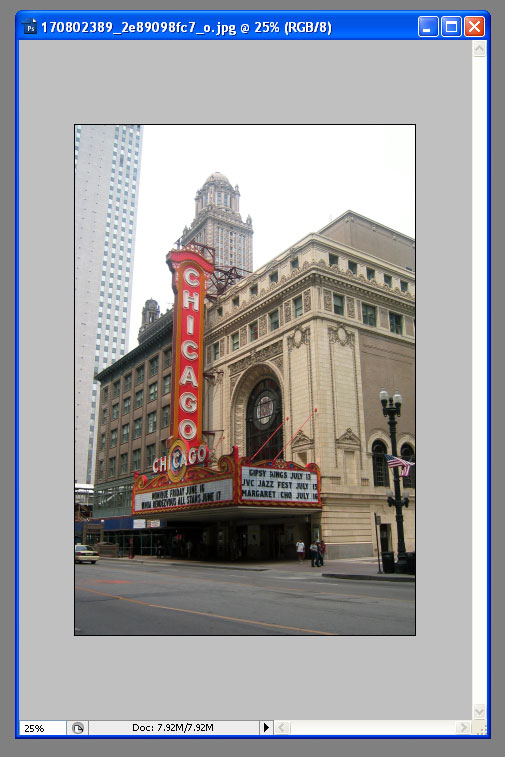
Open Photoshop, and the open up a photo of Chicago you already taken yourself or use one of the photos from folder I shared on Google Classroom.
The link to those photos is here: https://drive.google.com/drive/folders/1A-cFU4sjtEjEqomyXmy89hcrNtWprrtr?usp=sharing
Open Photoshop, and the open up a photo of Chicago you already taken yourself or use one of the photos from folder I shared on Google Classroom.
The link to those photos is here: https://drive.google.com/drive/folders/1A-cFU4sjtEjEqomyXmy89hcrNtWprrtr?usp=sharing
Step 2
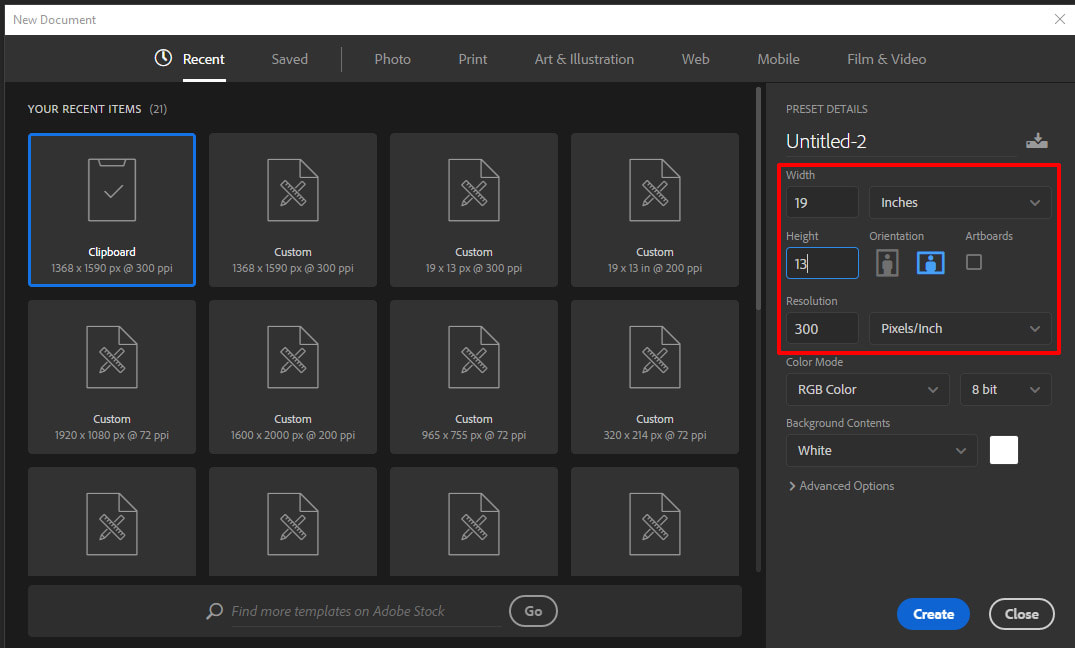
Make a new document that will become your finished Hockney Photocubism Image.
The new size should be 13" X 19" at 300 ppi.
Make a new document that will become your finished Hockney Photocubism Image.
The new size should be 13" X 19" at 300 ppi.
Step 3
Save this to your Google Drive folder as HockneyPhotocubism.psd
Save this to your Google Drive folder as HockneyPhotocubism.psd
Step 4
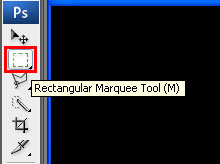
Go back to the photograph you took from our field trip, select the Rectangular Marquee tool
Go back to the photograph you took from our field trip, select the Rectangular Marquee tool
Drag around an area inside your photo with the Marquee Tool
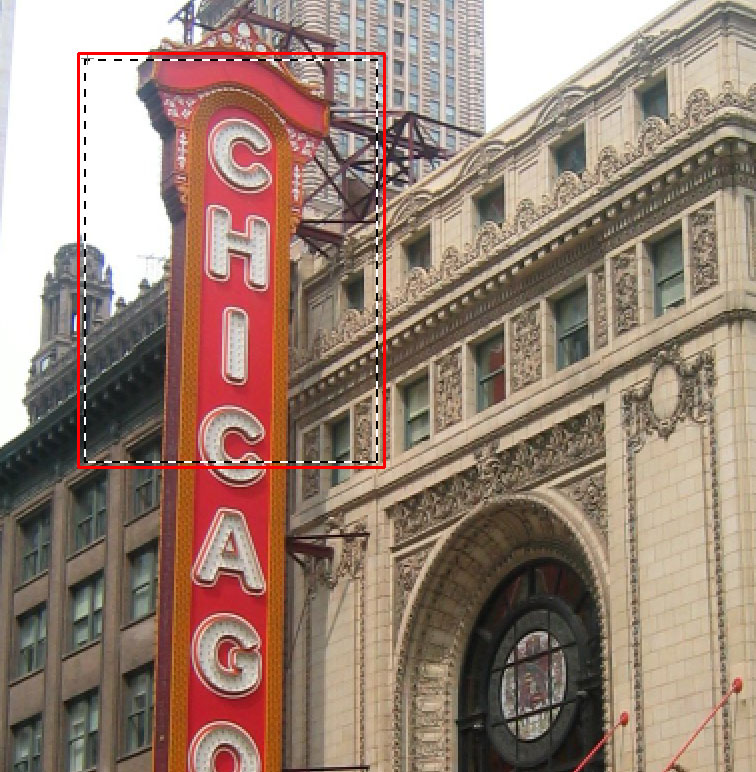
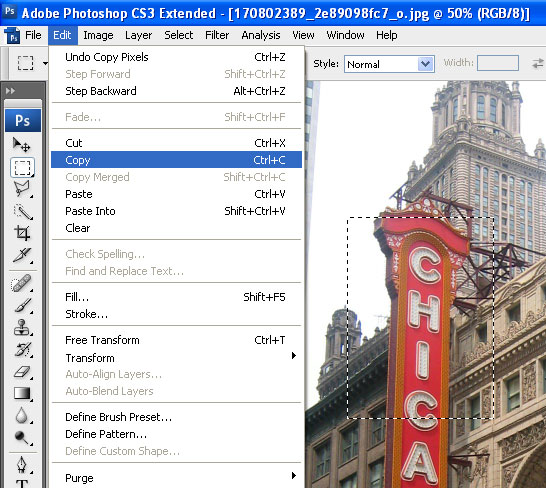
Then go to the Edit Menu > Copy the selected section from your photo.
Step 6
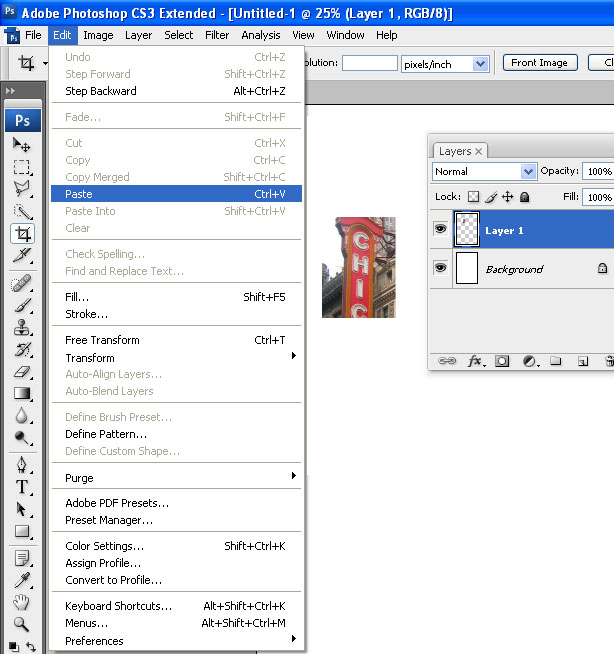
Go to the blank project you saved - Hockney Photocubism.psd file
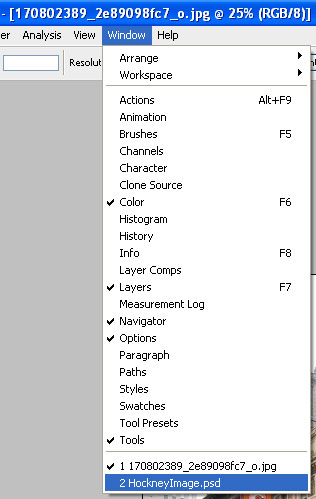
Window Menu > Select Hockney Photocubism.psd
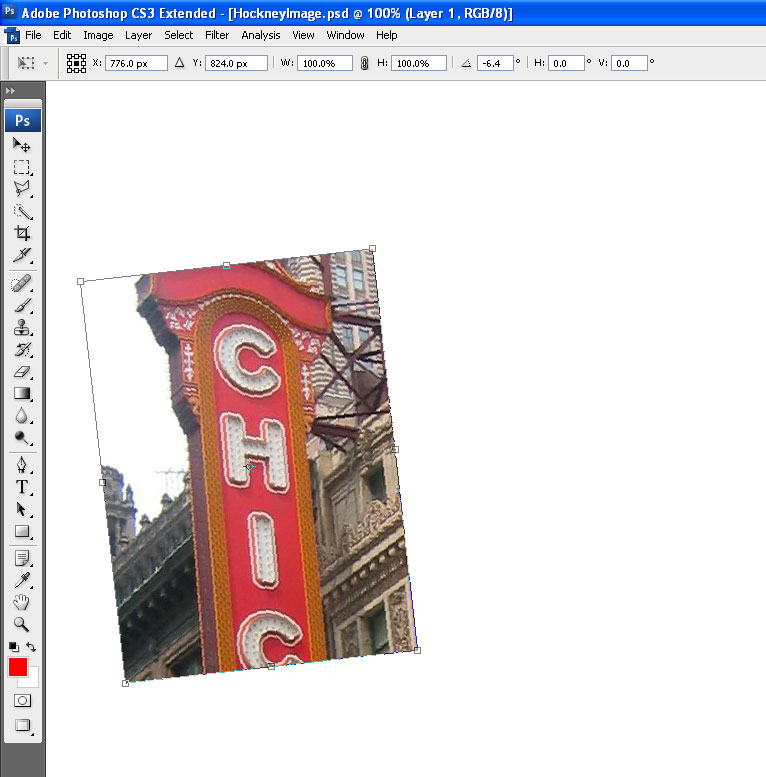
Now, Paste it into the document. This should paste as a new layer above the background.
Go to the blank project you saved - Hockney Photocubism.psd file
Window Menu > Select Hockney Photocubism.psd
Now, Paste it into the document. This should paste as a new layer above the background.
Use the Move Tool to move it around, rotate slightly or resize it slightly larger or smaller.
Step 7
Go back to your photograph Window Menu > Chicago Photograph (most likely it will be the one with numbers or letters.jpg)
Go back to your photograph Window Menu > Chicago Photograph (most likely it will be the one with numbers or letters.jpg)
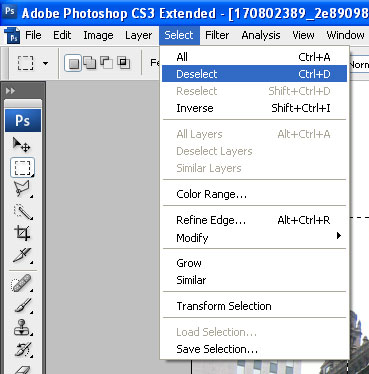
Select > Deselect (ctrl + d) to remove the selection outlines.
Step 8
Drag around ANOTHER area and Copy the selected section from your photo.
Step 9
Go to the HockneyPhotocubism.psd file and Paste it into this document again. This should paste as a new layer. Use the Move Tool to move it around, rotate slightly or resize it slightly larger or smaller.
Step 10
Go back to your photograph and then Select > Deselect (ctrl + d)
Step 11
Keep doing this procedure of making selections (different sizes, overlapping areas you already selected) Copying them and then Pasting them into the HockneyPhotocubism.psd file. Use 15 to 20 sections of photos in the final HockneyPhotocubism.psd file. Use the Move Tool to move it around, rotate slightly or resize it slightly larger or smaller.
Step 12
Save this to your Google Drive folder as HockneyPhotocubism.psd.
Now create a Screenshot of your project open in Photoshop with the Layers Panel open. This Screenshot will be saved on the Pictures folder
Turn this Screenshot into the post for this assignment on Google Classroom
WORTH 100 Points
Save this to your Google Drive folder as HockneyPhotocubism.psd.
Now create a Screenshot of your project open in Photoshop with the Layers Panel open. This Screenshot will be saved on the Pictures folder
Turn this Screenshot into the post for this assignment on Google Classroom
WORTH 100 Points
