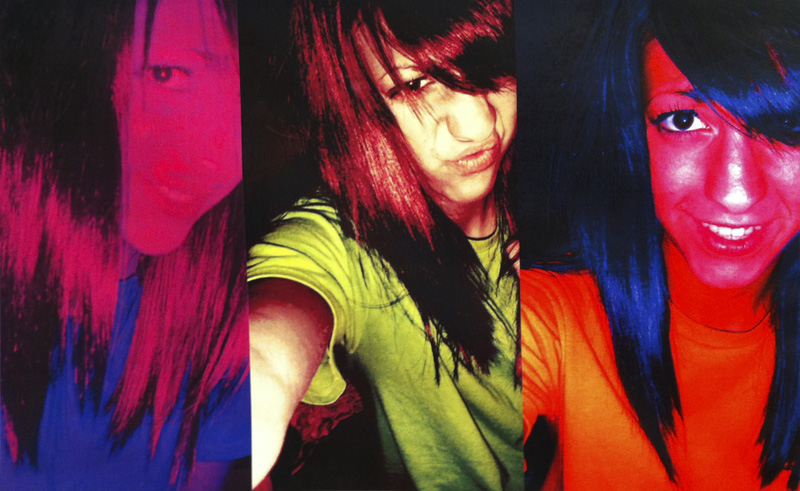
Triptych Photos
|
Directions
Create a triptych (series of three images side by side) self-portrait – three separate photos of you combined in one image and apply 3 different highly saturated vivid colors in Photoshop. Take several pictures of yourself using your digital camera making different emotional expressions with your face. (Examples: disbelief, scarred, and angry.) Download these here at school to your student folder. Begin to explore the different ways to manipulate the colors of the images using the following: |
Step 1
Open Photoshop
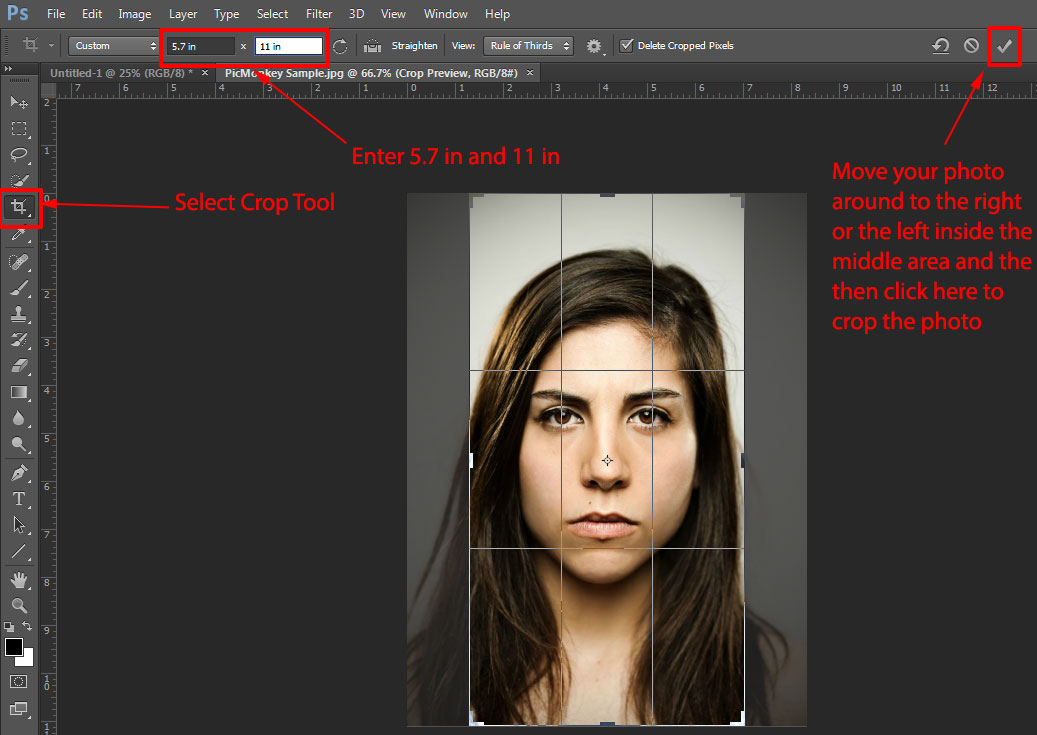
Use the Crop Tool to crop your image to 5.7 inches Wide by 11 inches High
Open Photoshop
Use the Crop Tool to crop your image to 5.7 inches Wide by 11 inches High
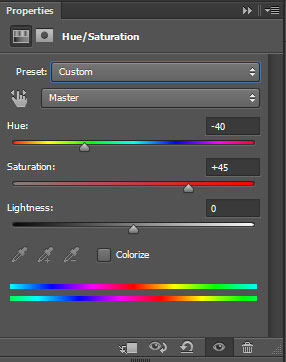
Step 2
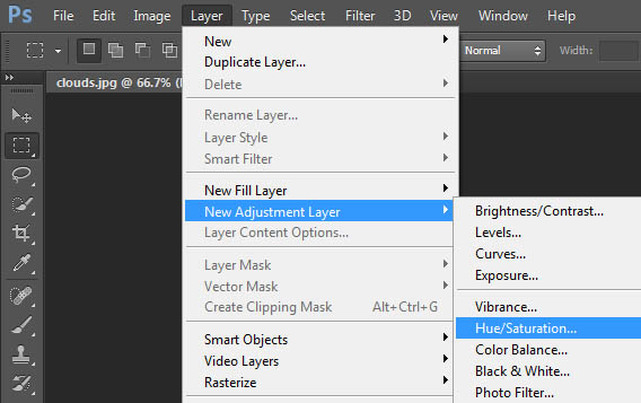
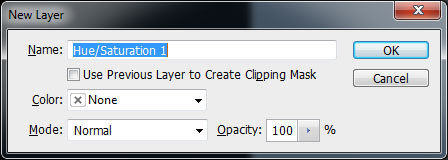
Add a Hue/Saturation Adjustment Layer
Add a Hue/Saturation Adjustment Layer
|
|
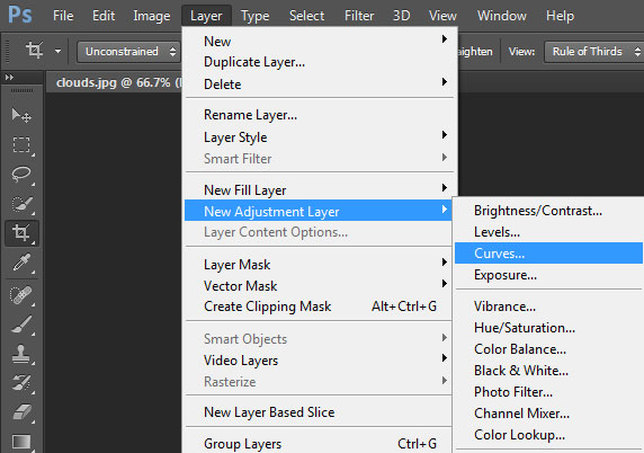
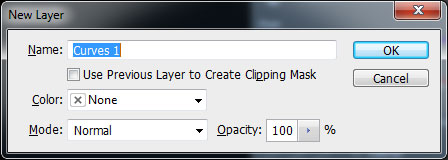
Step 3
Add a Curves Adjustment Layer altering the individual RGB channels
Add a Curves Adjustment Layer altering the individual RGB channels
|
|
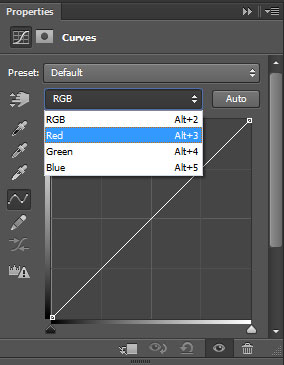
Step 4
Select the Red Curve
Select the Red Curve
|
Red Curve Adjustment 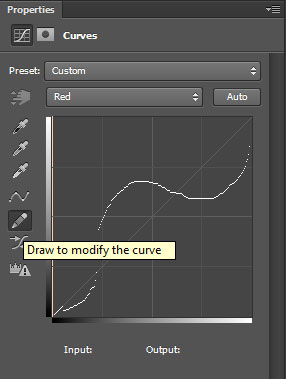
|
Green Curve Adjustment 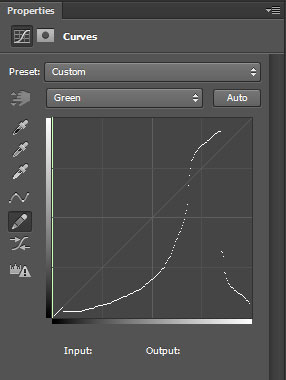
|
Blue Curve Adjustment 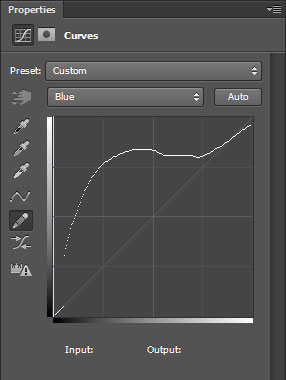
|
Step 5
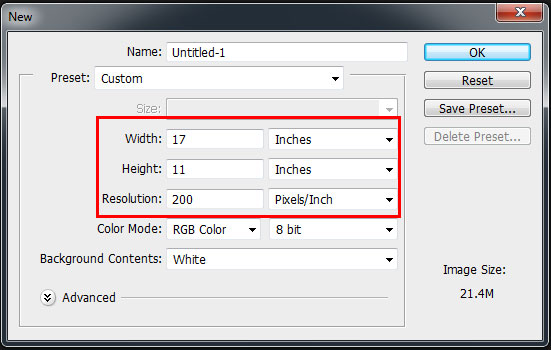
Once these individual images have been cropped and manipulated, combine them together in a new document that is 17 inches in Width by 11 inches in Height at a Resolution of 200 ppi.
Once these individual images have been cropped and manipulated, combine them together in a new document that is 17 inches in Width by 11 inches in Height at a Resolution of 200 ppi.
Step 6
Save this on the V: drive > Digital Photography > Period 2 > that specific projects folder > Last Name_TriptychPortraits.psd
