This is the INDEX page that is reserved for Weebly system use ONLY!
This page is automatically assigned by Weeby for Single Product Page, Checkout Page, and search result page
DO NOT USE THIS PAGE
Photo composite - realistic
|
|
Photos by |
Directions
A photo composite is a combination of two or more photos together. In this photo composite your goal is to composite 2 or more photos together so the end result looks realistic. Meaning it looks like the elements were all there when the photo was taken.
Creating a natural–looking montage of images is dependent upon them having a degree of compatibility in terms of lighting source and perspective. Be careful when selecting your separate images.
The above image was created by commercial photographer Joel Grimes. See how he creates photo composite images using a Wacom Intuos Tablet @ http://101.wacom.com/i4settings/joel-grimes.php
Here is a tutorial about making a realistic photo composite from two images.
http://glyndewisblog.com/2010/11/29/creating-a-composite-image-in-photoshop/
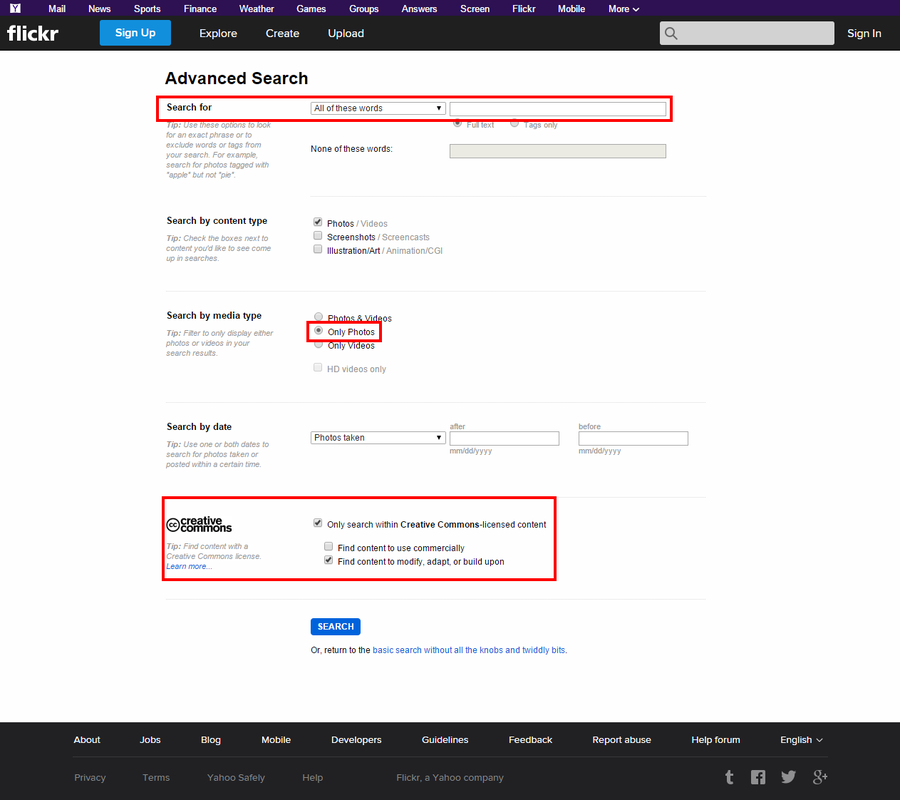
Step 1
Use Flickr > Advanced Search to locate two photos that could be used to create the composite.
The pictures you use must be 1000 x 1000 pixels or larger.
Collect the elements needed to create the composite and developing ideas on how you are going to combine them. Think carefully about these photos. Not all photos would work together well for this type of project. Pay attention to the lighting in the separate images when you select them. When different lighting is used in a composite it is a dead give away that it is fake. We are trying to make it appear that these images we both there when the photo was taken.
|

|
Step 2
Select the image from the background using the techniques:
Quick Selection Tool or Quick Mask Mode to make selections in your photos. Use the Refine Edge Command if needed to clean up the edges of the selection.
Now, use the Move tool to drag and drop one photo onto another one. You could also Copy & Paste images together.
They also might need to be adjusted in size or proportion using the Edit Menu > Free Transform (CTRL + T) tool. Please hold down shift key as you drag inward to make the image smaller.

Step 3
Adjusting the colors to match if needed
You may need to adjust the colors and contrast from the three separate images to better match your new composite. This can be accomplished using Adjustment Layers - Levels, Curves, or Hue & Saturation.
Dodge and Burning can also be used to achieve great results in blending the images seamlessly.

Step 4
Save this on the V: drive > Digital Photography > Period 2 > that specific projects folder > Your Last Name_composite-realistic.psd
