Segmented Photos
|
DIRECTIONS
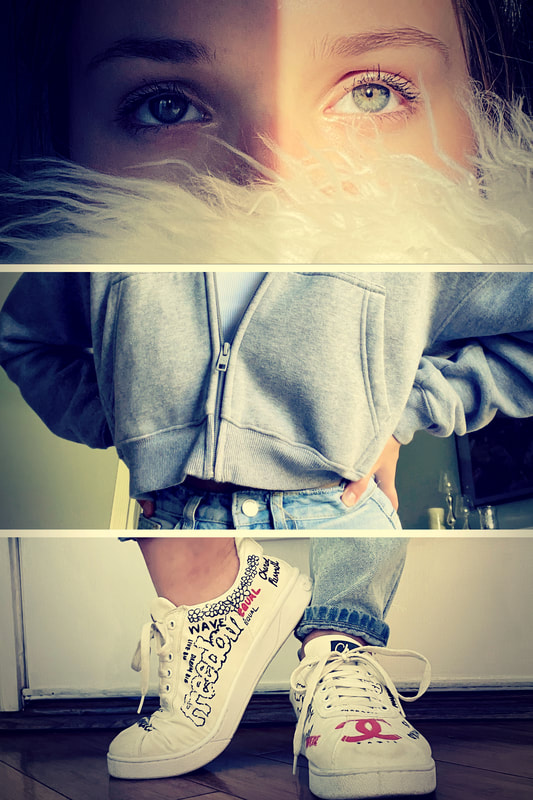
Segmented Portraits uses the three panels to display the face, midsection and feet of the person—surprisingly, these three portions of people can give a lot of insight into their personality. Take 3 photos - a person’s face, waist (include their hand or hands) and their shoes - feet. You should take several of these however to have a bunch to chose from. Have your brother, sister, parents or friends be your subject. You might also want to team up here at school with another person, take several photos around school to get different ones of yourself or your partner for this project. When you compose and take these photos make sure you zoom in pretty close and take a good in focus photo. Change your height and keep getting lower as you take the photos. Retake these if they are not in focus! |
Step 1
Open Photoshop
Open Photoshop
Step 2
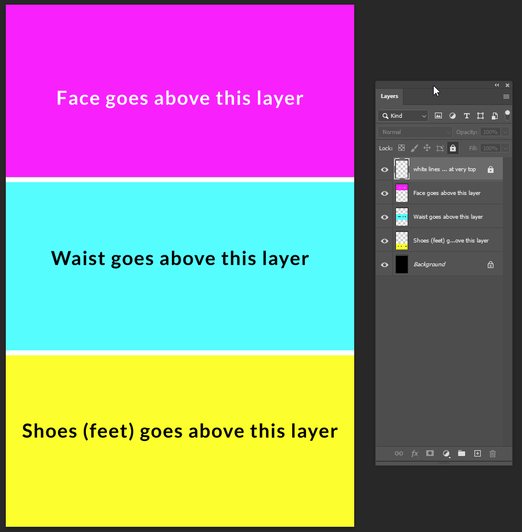
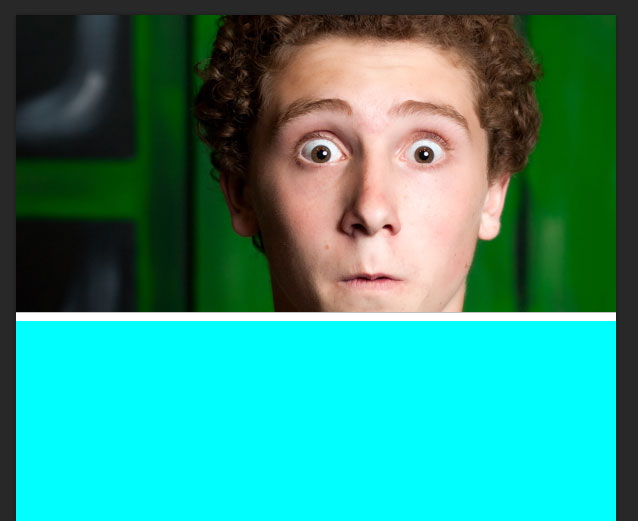
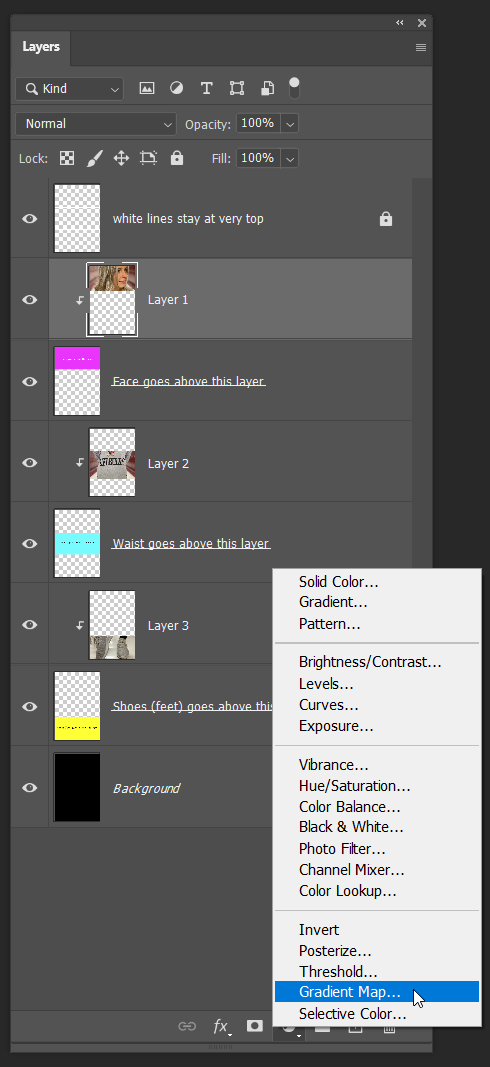
Download this template from the Google Classroom post. Then, open this template – Segmented Portrait Template 2022.psd. It looks like this:
Download this template from the Google Classroom post. Then, open this template – Segmented Portrait Template 2022.psd. It looks like this:
Step 3
Open the 3 photos you took (face, waist, shoes) in Photoshop
Open the 3 photos you took (face, waist, shoes) in Photoshop
Step 4
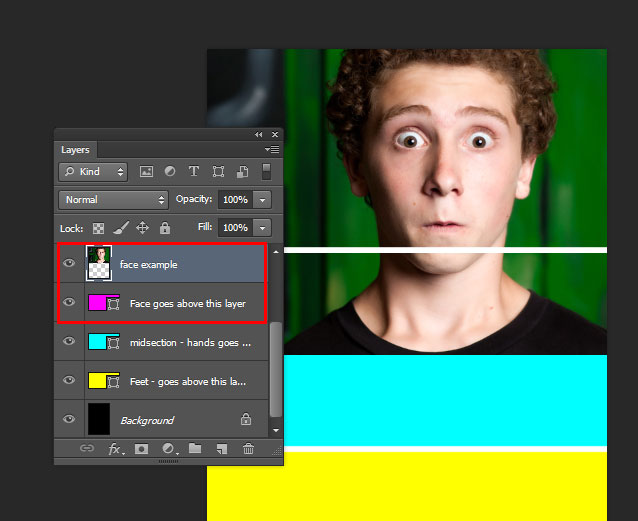
Move one photo of your face in the layer palette above the layer called Put Face photo here.
Adjust this photo to fit the area to the first white line. Increase or decrease the size of this layer if desired to get different looks.
Move one photo of your face in the layer palette above the layer called Put Face photo here.
Adjust this photo to fit the area to the first white line. Increase or decrease the size of this layer if desired to get different looks.
Step 5
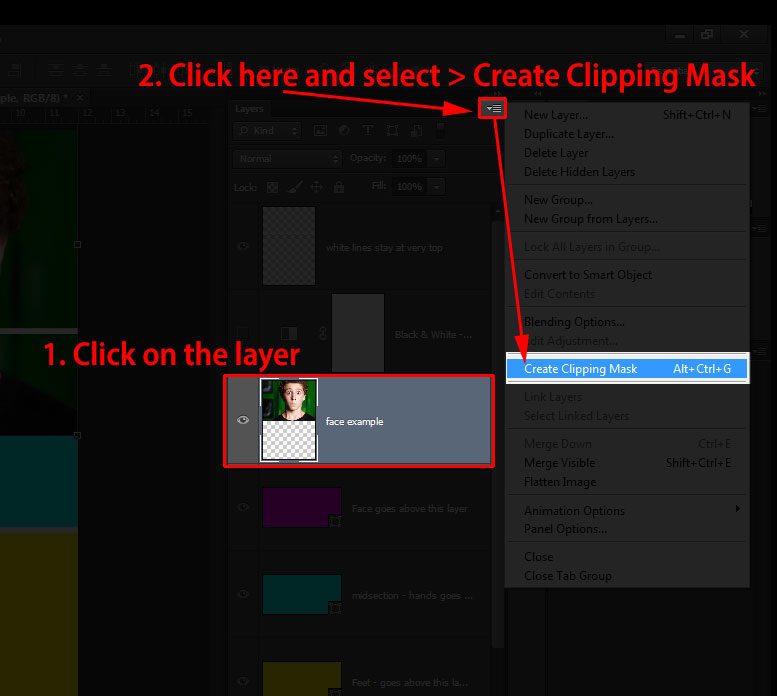
Get your face photo the size you want. IT SHOULD EXTEND AND GO PAST THE WHITE LINE. Then do the 2 steps seen below in the screenshot: Click on the layer, and Create a Clipping Mask
Get your face photo the size you want. IT SHOULD EXTEND AND GO PAST THE WHITE LINE. Then do the 2 steps seen below in the screenshot: Click on the layer, and Create a Clipping Mask
This is the result you should get after applying the clipping mask on the face.
Step 6
Now, move one photo of your waist and feet above the layers Put midsection photo here, Feet photo here as well, and do the same steps as you just did in Step 5 above.
Adjust these photos to the size you want. Increase or decrease the size of these layers if desired to get different looks.
Now, move one photo of your waist and feet above the layers Put midsection photo here, Feet photo here as well, and do the same steps as you just did in Step 5 above.
Adjust these photos to the size you want. Increase or decrease the size of these layers if desired to get different looks.
Step 7
Save this on your Google Drive as Segmented Portrait 1.psd
Save this on your Google Drive as Segmented Portrait 1.psd
Step 8
Repeat these steps with 3 different photos. Save this on your Google Drive as Segmented Portrait 2.psd
Repeat these steps with 3 different photos. Save this on your Google Drive as Segmented Portrait 2.psd
Step 9
Repeat these steps with 3 different photos. Save this on your Google Drive as Segmented Portrait 3.psd
Repeat these steps with 3 different photos. Save this on your Google Drive as Segmented Portrait 3.psd
Step 10
Now edit Segmented Portrait 1.psd
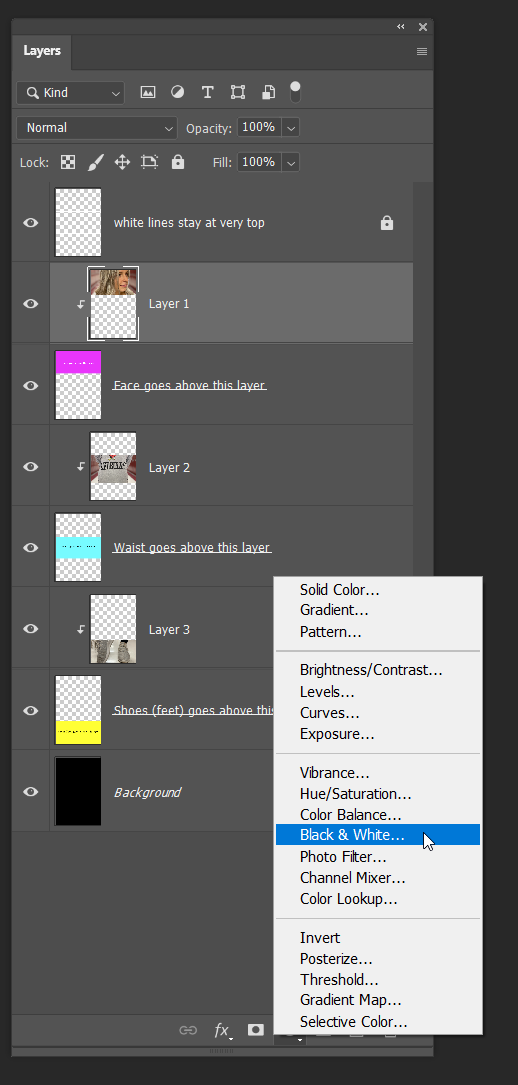
Click on the top layer below the White Lines layer (This should be your face) and making it a Black and White image using an Adjustment layer.
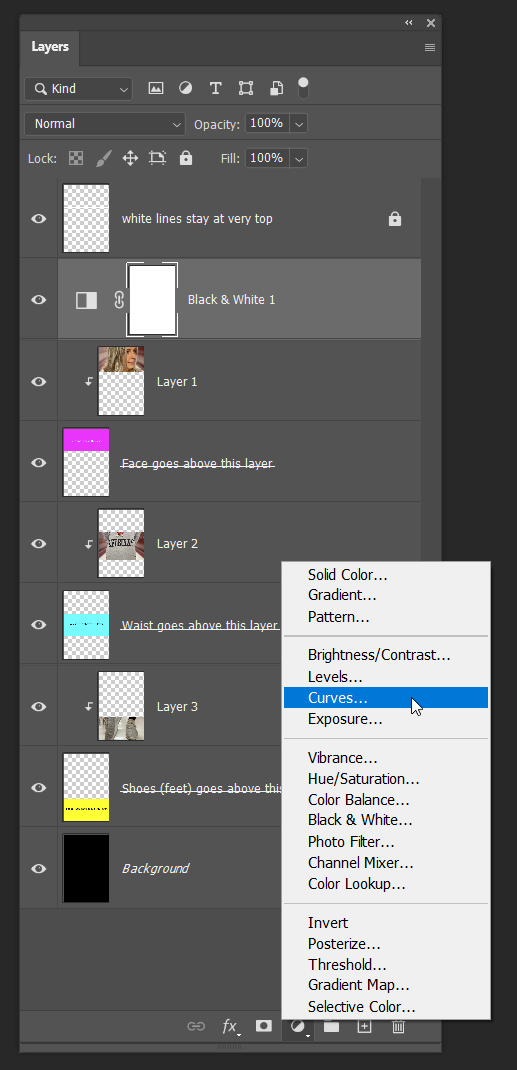
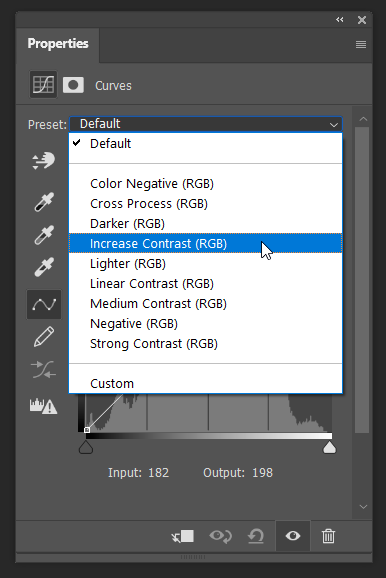
Next, add a Curves Adjustment layer and in the Properties Panel (Window Menu > Properties) select the Preset > Increase Contrast
Now edit Segmented Portrait 1.psd
Click on the top layer below the White Lines layer (This should be your face) and making it a Black and White image using an Adjustment layer.
Next, add a Curves Adjustment layer and in the Properties Panel (Window Menu > Properties) select the Preset > Increase Contrast
|
|
|
Step 11
Now edit Segmented Portrait 2.psd by making it have more Muted Colors using Adjustment layers.
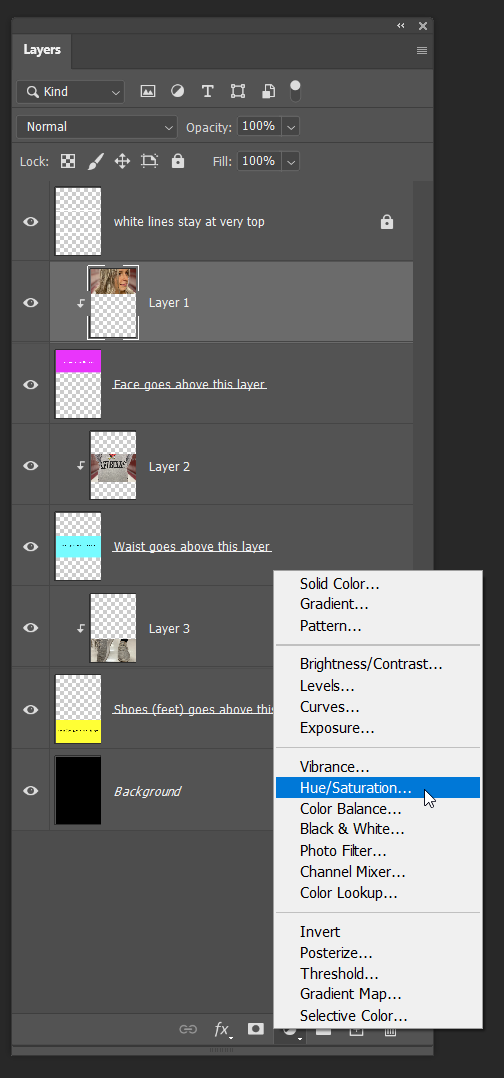
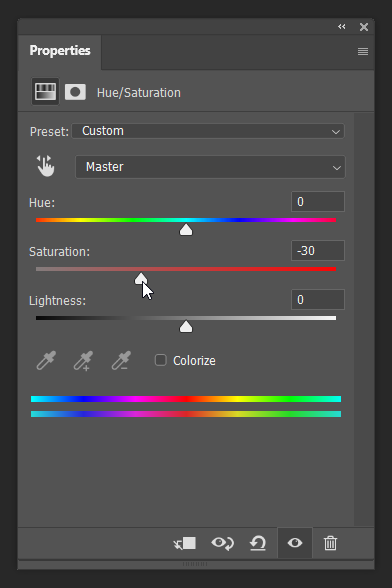
First, add a Hue and Saturation Adjustment Layer and lower the Saturation slider
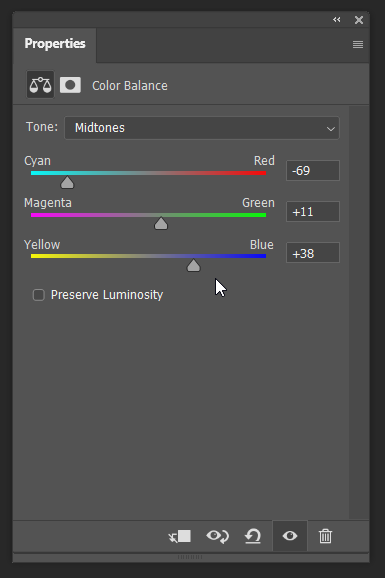
Second, add a Color Balance Adjustment Layer and adjust the sliders to get the colors the way you like.
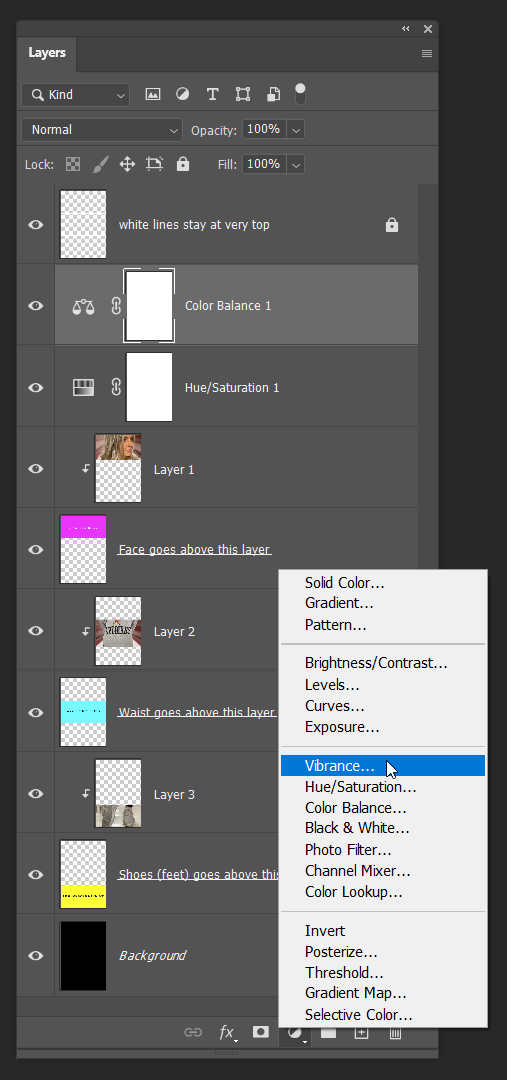
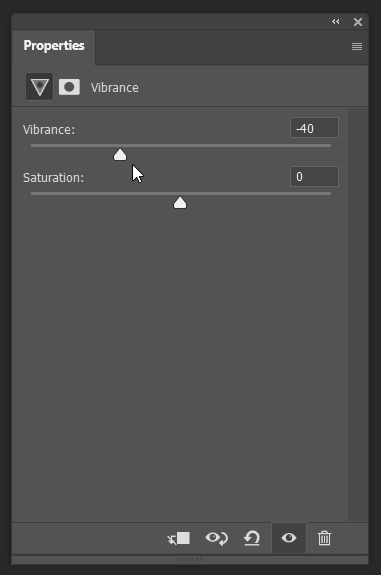
Finally, and a Vibrance Adjustment Layer and lower the Vibrance slider.
Adjust any of these Layer Blending modes to see different looks if you like.
Now edit Segmented Portrait 2.psd by making it have more Muted Colors using Adjustment layers.
First, add a Hue and Saturation Adjustment Layer and lower the Saturation slider
Second, add a Color Balance Adjustment Layer and adjust the sliders to get the colors the way you like.
Finally, and a Vibrance Adjustment Layer and lower the Vibrance slider.
Adjust any of these Layer Blending modes to see different looks if you like.
|
|

|
|
|
Step 12
Now edit Segmented Portrait 3.psd by making it have Neon Colors using Adjustment layers.
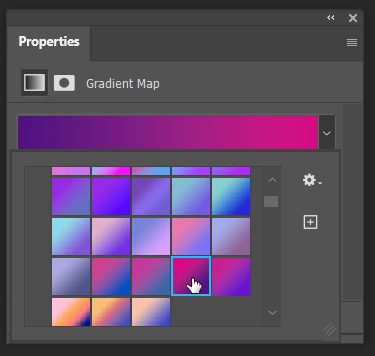
Add a Gradient Map Adjustment Layer
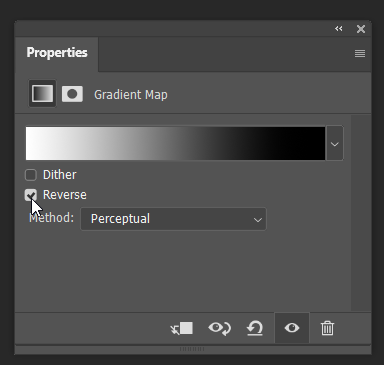
In the Properties Panel > Check Reverse
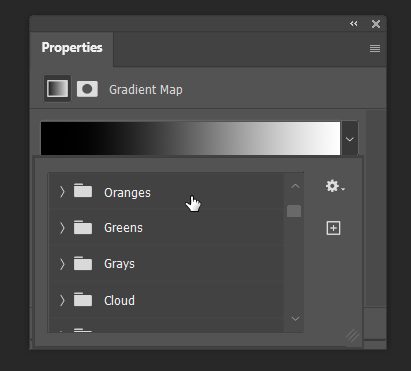
Click the Dropdown arrow down to open the folders of different colors
Open any of the Color folders and open by clicking on the arrow to the left of the folder
Now edit Segmented Portrait 3.psd by making it have Neon Colors using Adjustment layers.
Add a Gradient Map Adjustment Layer
In the Properties Panel > Check Reverse
Click the Dropdown arrow down to open the folders of different colors
Open any of the Color folders and open by clicking on the arrow to the left of the folder
|
|

|
|
Click on any Gradient you like
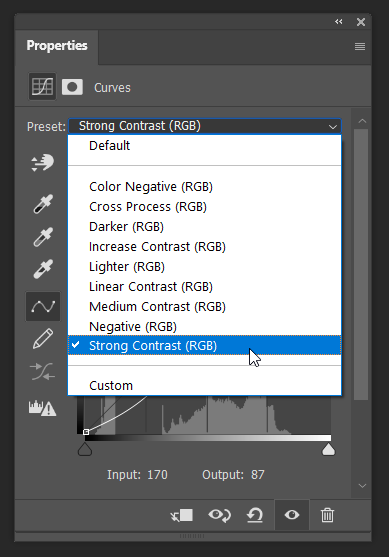
Next Add a Curves Adjustment Layer
In the Properties Panel add the Strong Contrast option from the Preset dropdown
Next Add a Curves Adjustment Layer
In the Properties Panel add the Strong Contrast option from the Preset dropdown
|

|
|
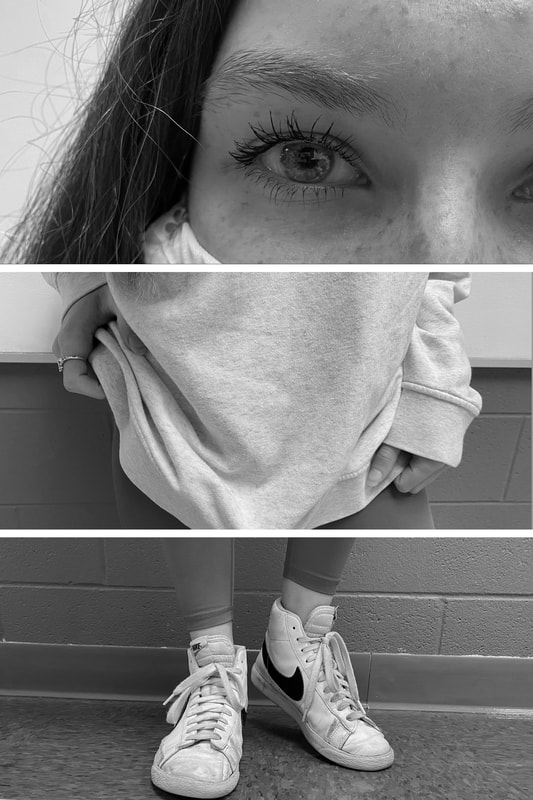
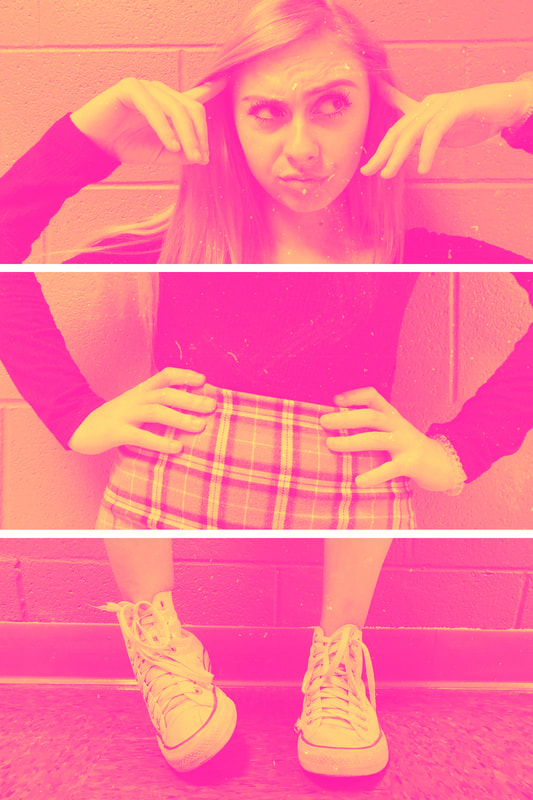
See examples below:
|
1. Black & White
|
2. Muted Colors

|
3. Neon Colors
|
Saving and submitting these files to Google Classroom for Grading
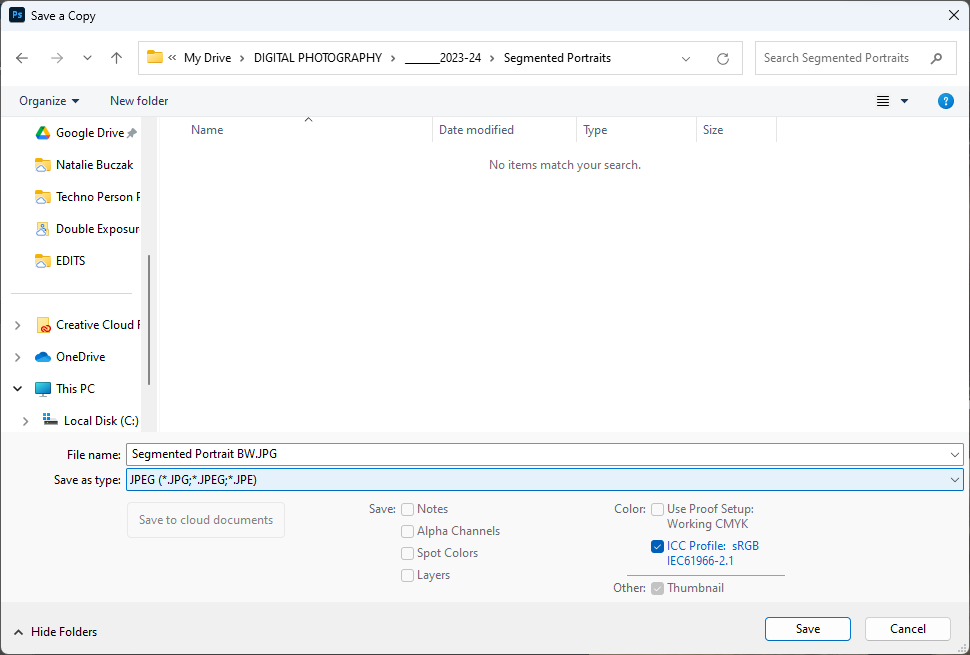
When you ARE FINISHED WITH ALL please submit the following 3 FILES to Google Classroom for grading:
Segmented Portrait BW.JPG
Segmented Portrait MUTED COLORS.JPG
Segmented Portrait NEON COLORS.JPG
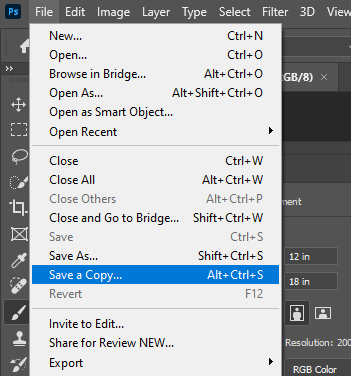
To save these files go to File > Save a Copy
Segmented Portrait BW.JPG
Segmented Portrait MUTED COLORS.JPG
Segmented Portrait NEON COLORS.JPG
To save these files go to File > Save a Copy
|
|
