Overlay Multiple Photos
|
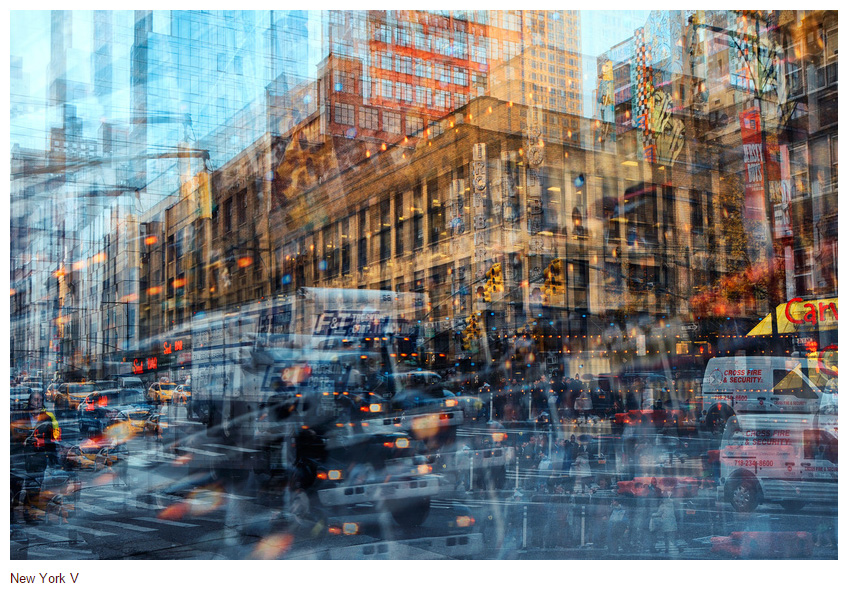
Stephanie Jung creates stunning urban landscapes, overlaying near-identical city scenes that have been taken from slightly different angles, at different transparencies and color intensities. The repeated forms (buildings / vehicles / street signs) suggest echoed memories, vibrations of life; the ebb and flow of time.
|

Directions
Create a Multiple Layered Image project with photos you took from our filed trip to Chicago. Then develop alternate color version.
Create a Multiple Layered Image project with photos you took from our filed trip to Chicago. Then develop alternate color version.
Import Multiple Images into one Layered Document
Open up Photoshop
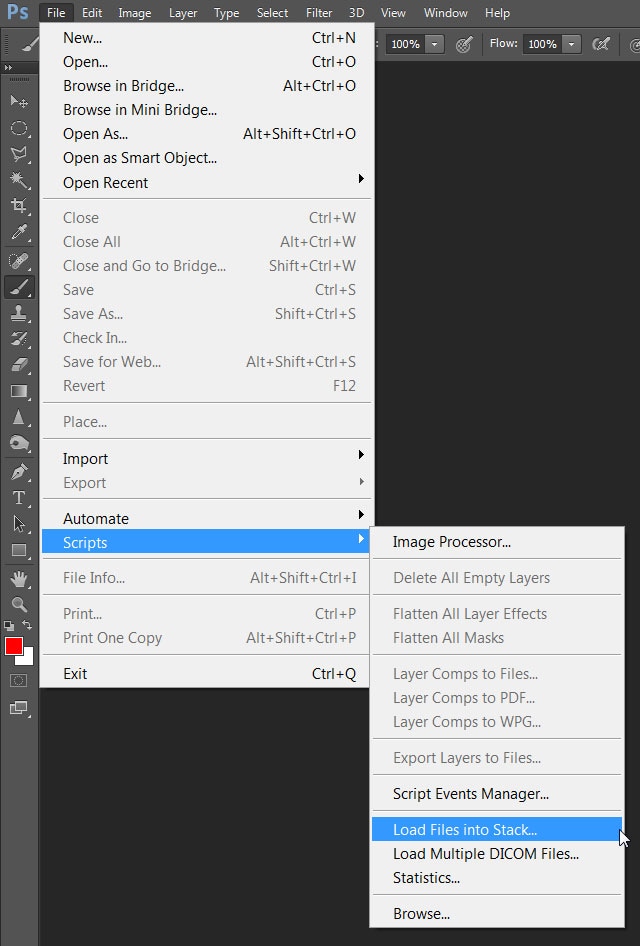
At the top of your Photoshop menu, go to File > Scripts > Load Files into Stack…
At the top of your Photoshop menu, go to File > Scripts > Load Files into Stack…
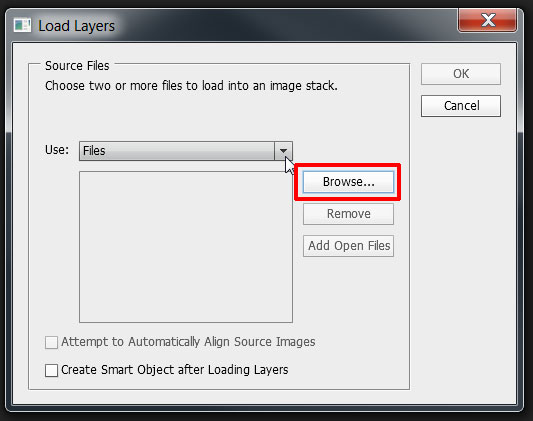
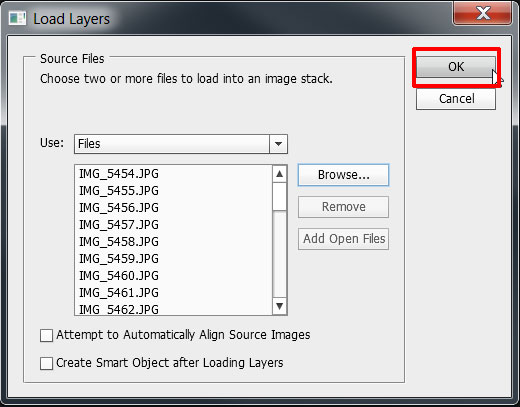
From there, you’re prompted with a new window that has a few options/actions.
It’s fairly straight forward, but as long as you know where all the images you want to import at once are, you’re pretty much set.
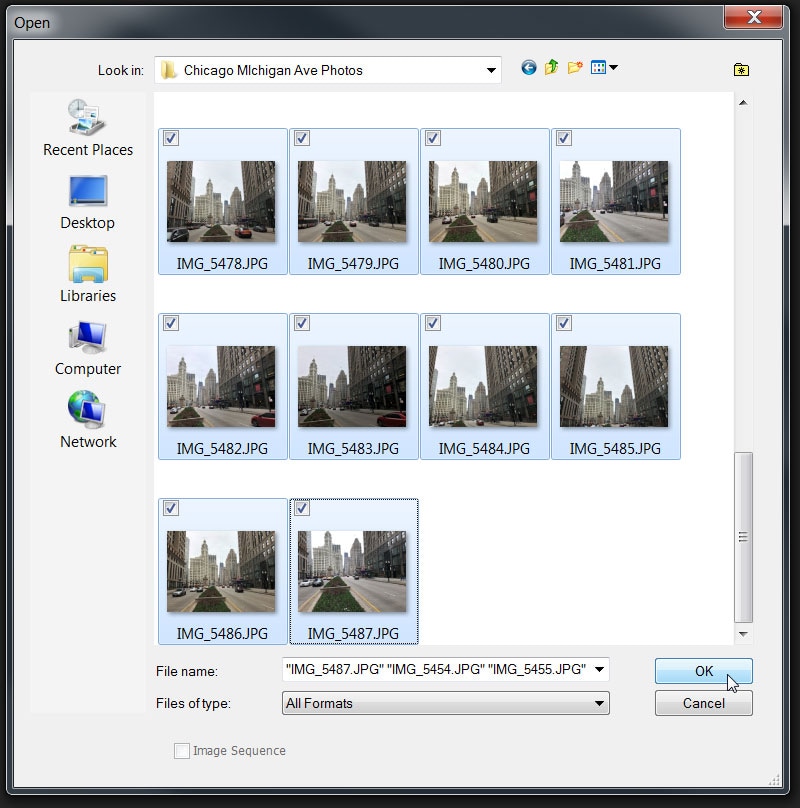
Hit Browse, then select/shift-click/highlight your group of images (whatever you prefer to do for selecting multiple files at once). The images will appear in the empty white space of the window as a list, by their respective file names. Go ahead and hit OK, and watch Photoshop do its magic.
It’s fairly straight forward, but as long as you know where all the images you want to import at once are, you’re pretty much set.
Hit Browse, then select/shift-click/highlight your group of images (whatever you prefer to do for selecting multiple files at once). The images will appear in the empty white space of the window as a list, by their respective file names. Go ahead and hit OK, and watch Photoshop do its magic.
|
|
|
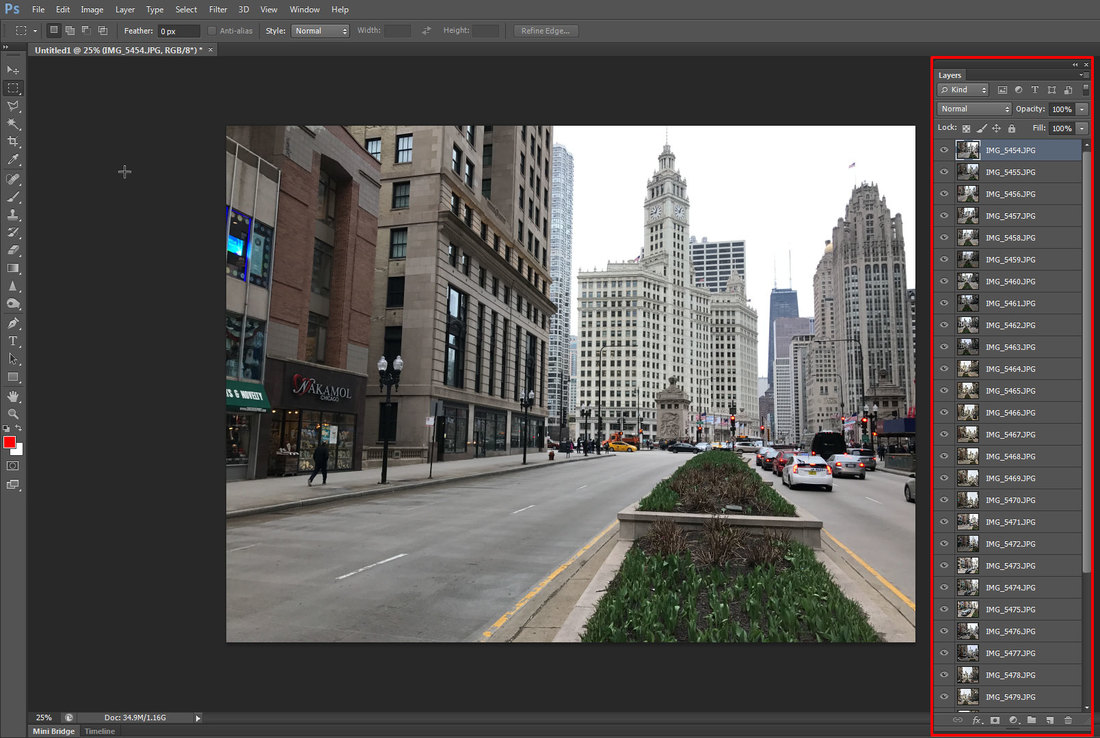
Before long, you’ll have a single Photoshop document, with a layer for each image file you imported on top of one another.
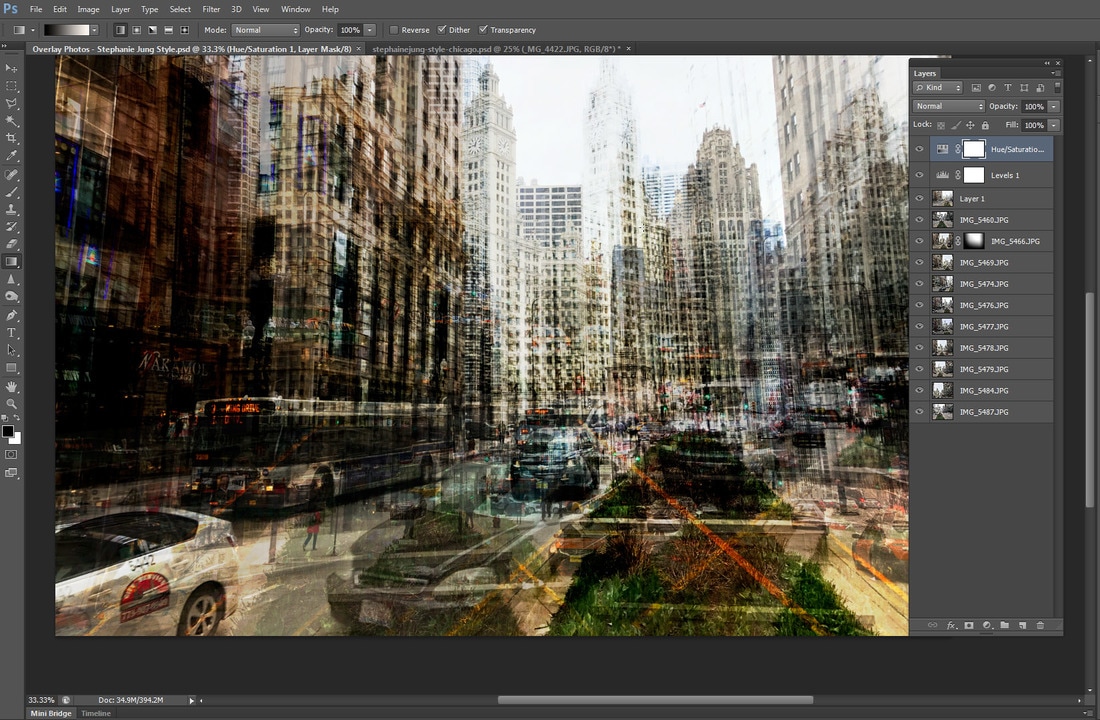
Select a layer and adjust the following: Layer Blend modes (good ones to use are Overlay, Screen, Color Dodge, Hard Light, Soft Light and Multiply) while adjusting the layers Opacity to a lower number than 100%.
You also DON'T need all 20 or more of the photos you shot. In this example I shot almost 30 photos of this scene, but ended up using just 11 of them for the final composition. Make sure you use at least 10 in your final project.
I also used Adjustment Layers for increasing Contrast and Saturation.
You can add Layer Masks to hide part of the photo from appearing. This is great when the image gets dark in several spots. Use a Layer Mask to hide parts of the image
I also used Adjustment Layers for increasing Contrast and Saturation.
You can add Layer Masks to hide part of the photo from appearing. This is great when the image gets dark in several spots. Use a Layer Mask to hide parts of the image
Save this to the correct folder on the V: Drive > Advanced Photography > 07_Overlay Photos Chicago FT as Your Last Name _Overlay Photo1.psd
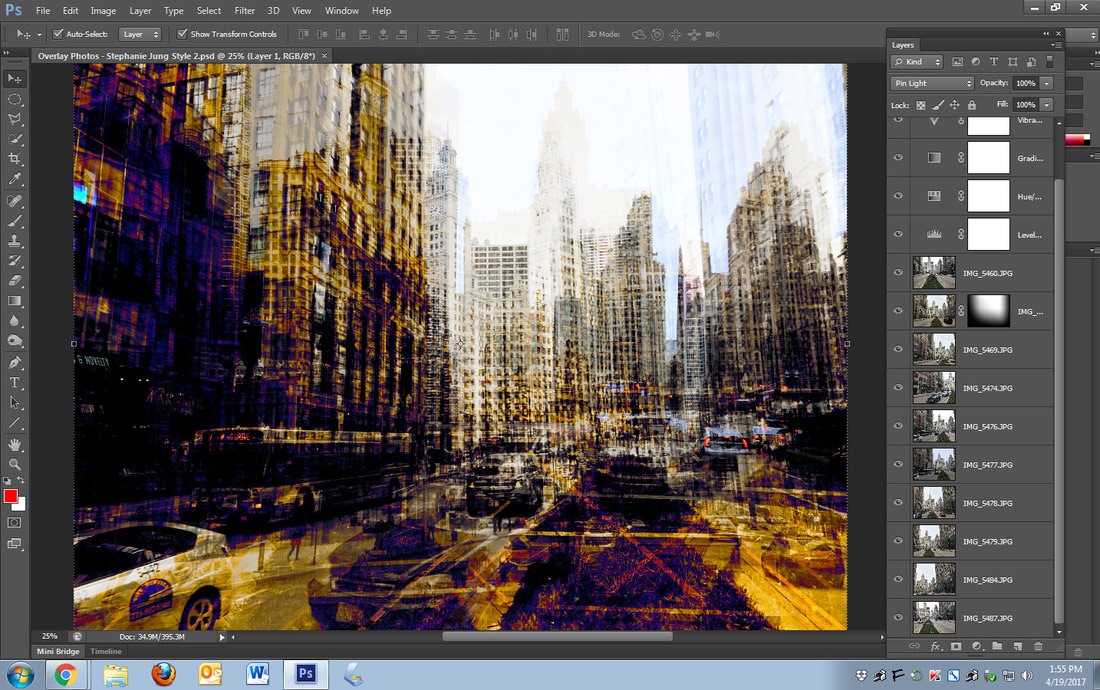
Now create an alternate version with unrealistic vivid colors. Try Adjustment Layers > Gradient Overlay, Curves, Hue and Saturation and Vibrance in combinations.
Save this to the correct folder on the V: Drive > Advanced Photography > 07_Overlay Photos Chicago FT as Your Last Name _Overlay Photo2.psd
