Personal Collage

Directions
|
After finishing the Photoshop Exercises you will use these skills with Photoshop in the following project...called a Photomontage. A Photomontage is a multi-image picture created by a photographic film or digital process.
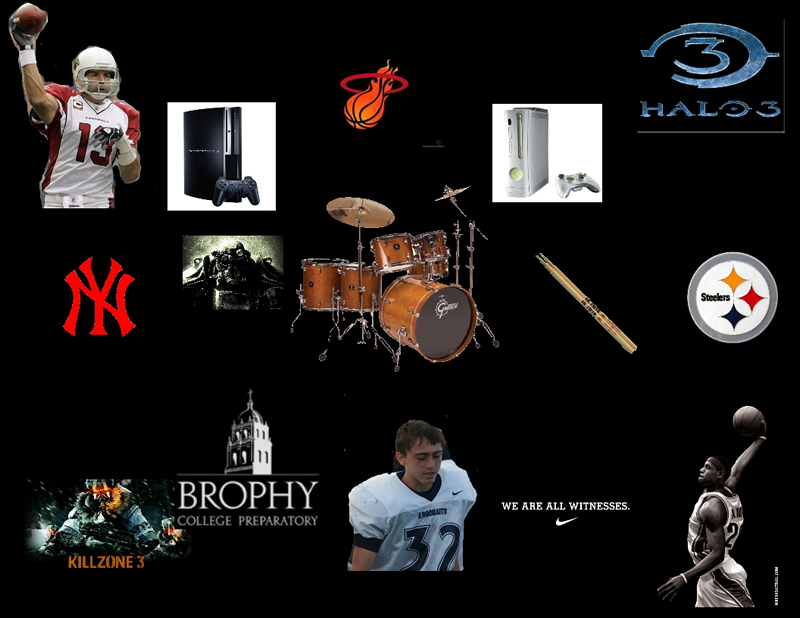
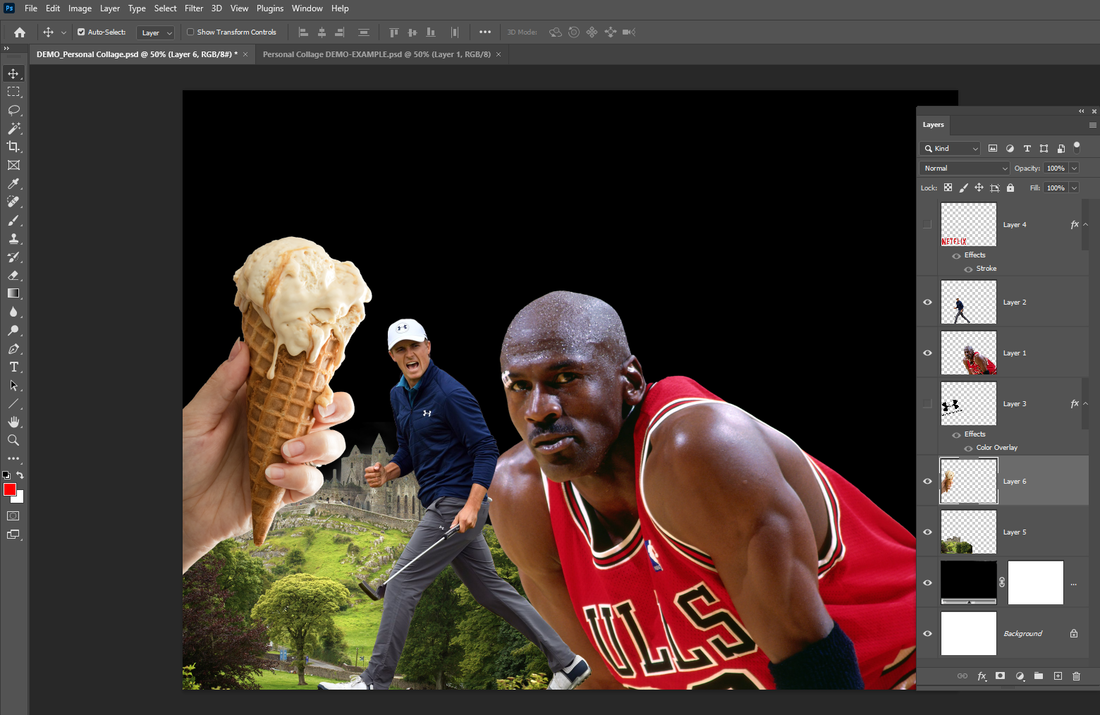
Using Adobe Photoshop, create an artistic digital collage about you. The final composition should be a collage-style illustration that combines at least 10 to 12 separate photos. ALL of these photos should come from Google Advanced Image Search. We just learned about using this in the Digital Imaging Slideshow questions. Your personal collage should be an “overall” representation of your likes and interests! It may include any of the ideas listed below, but is not limited to this list. Be sure that it is appropriate for a school project, and do the best job you can. This is one of a few collages you will complete this year, so it is important that you learn how to use the Photoshop tools effectively. Photoshop Layers and Selections and Refine Edge (required depending on the selected photos) will be used extensively in this assignment. There should be NO photos of you, rather I want to see things that represent you, who you are, your likes and interests. Save these photos to your computer. Make sure to save the largest sizes, pixel dimensions in the thousands, not hundreds are needed. See this info below in Step 1 In order to make you think about what is really important to you, you will be limited between 10 and 12 photos that represent you. Photos should be sized differently to signify there importance to you – things that are larger will be more important. These photos should be overlap each other like the examples seen below. DO NOT spread all of your chosen photos away from each other, which creates a very uninteresting composition. SCALE and EMPHASIS MUST be used in your project. Sizing your photos will play major role in these Principles of Photography and a big part of GRADING these projects! Review these Principles of Photography from the PowerPoint slideshow on the Elements/Principles in Photography here Photographs that represent you could come from the following list of topics:
|
Step 1
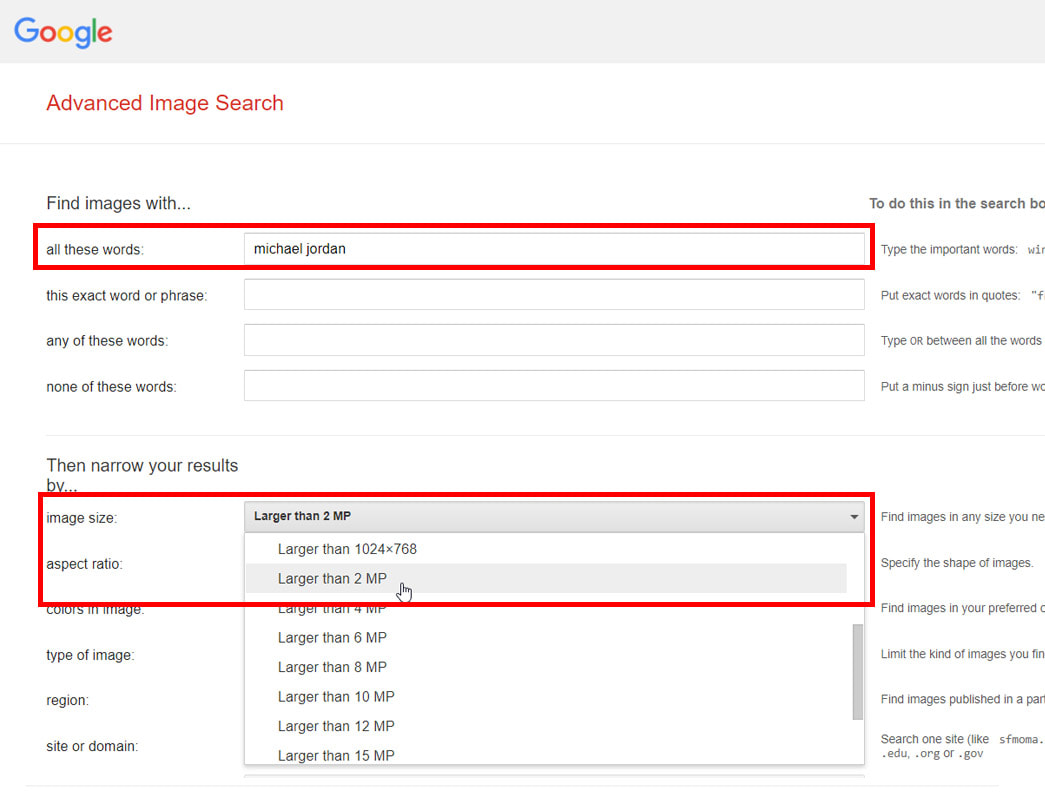
Find photos of your interests larger than 2MP using Google - Advanced Image Search
All of these images MUST have a background! DO NOT LOOK FOR OR SAVE photos with TRANSPARENT BACKGROUNDS!
YOU MUST REMOVE THE BACKGROUND ELEMENT IN ADOBE PHOTOSHOP as we did in Exercise 2!
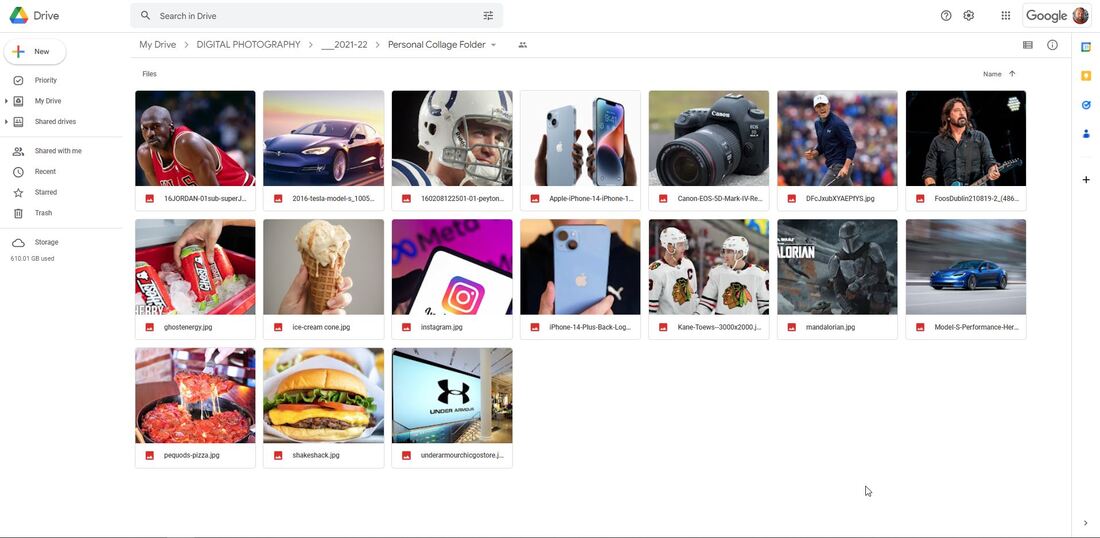
Save them to your computer or Google Drive in a NEW folder called - Personal Collage.
DO NOT COPY and PASTE these photos into ANY type of document!
All of these images MUST have a background! DO NOT LOOK FOR OR SAVE photos with TRANSPARENT BACKGROUNDS!
YOU MUST REMOVE THE BACKGROUND ELEMENT IN ADOBE PHOTOSHOP as we did in Exercise 2!
Save them to your computer or Google Drive in a NEW folder called - Personal Collage.
DO NOT COPY and PASTE these photos into ANY type of document!
Step 2
Once these have been saved to your Google Drive - Call me over to check all these photos before moving to Step 3!
Step 3
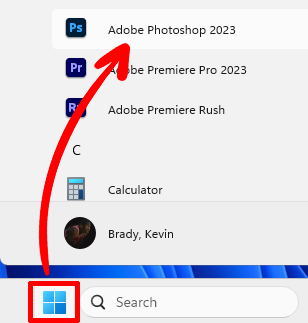
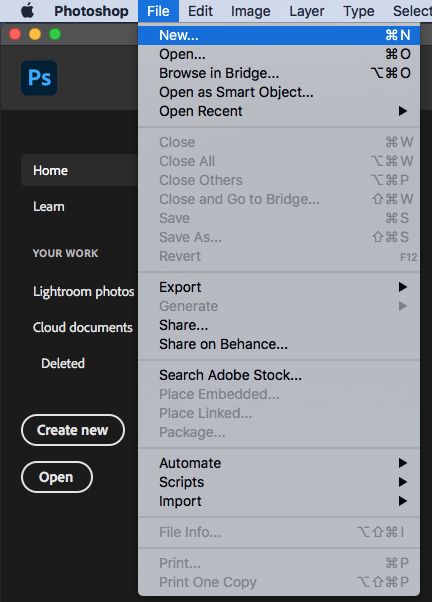
Open Adobe Photoshop > Windows Start Icon > All Apps > Adobe Photoshop
Then create a New file
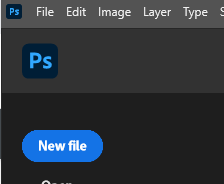
File > New or click the New file button
Then create a New file
File > New or click the New file button
|
|
|
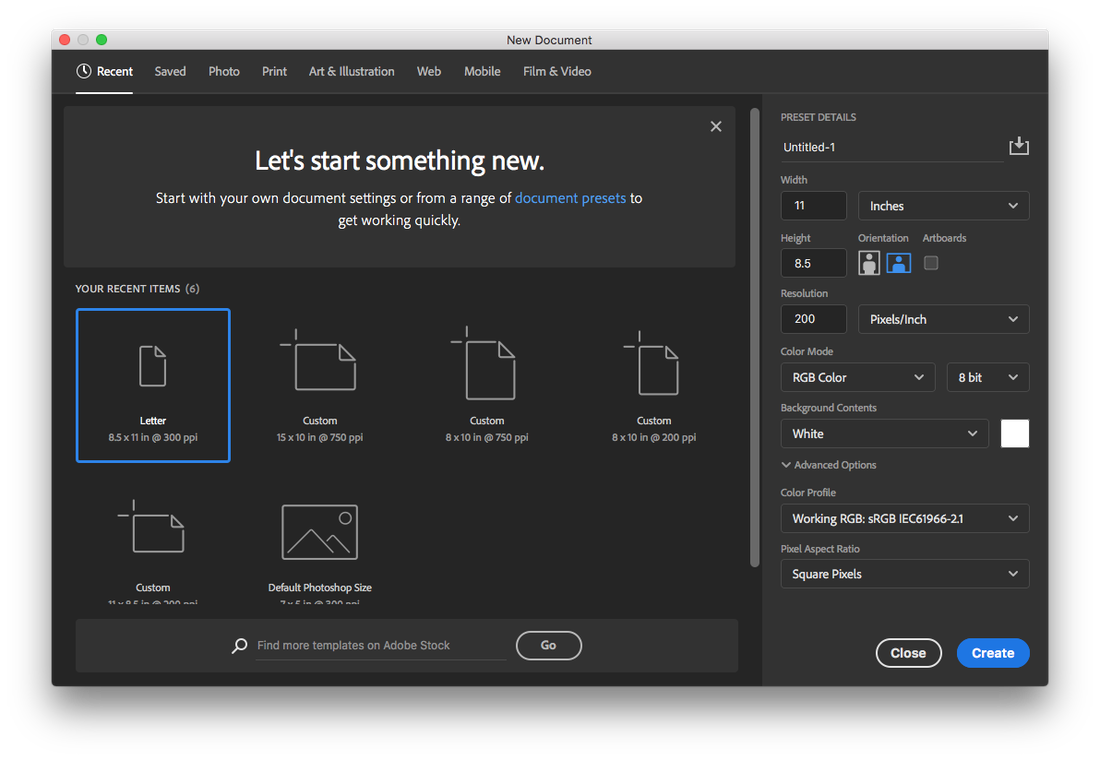
Enter the following dimension and resolution
(see the Width, Height, Resolution, and Orientation from picture below):
(see the Width, Height, Resolution, and Orientation from picture below):
- LETTER
- Width 11 Inches
- Height 8.5 Inches
- Resolution 200 Pixels/Inch
- Click the Create button at the bottom
Step 4
Start by opening up one of the 10 or 12 images you saved in Photoshop to begin working
Use the different selection tools we have learned - Move Tool, Quick Selection Tool, Refine Edge Command and the use of the Layers Panel to combine your photos into this new document.
Use the different selection tools we have learned - Move Tool, Quick Selection Tool, Refine Edge Command and the use of the Layers Panel to combine your photos into this new document.
Move, Re-size photos, and rotate photos to complete your collage
To Re-size photos do the following:
After you bring the photo into the new background you made in Step 2 it might need re-sizing.
Go to Edit > Free Transform or Press the CTRL+T keys at the same time to bring up Free Transform
After you bring the photo into the new background you made in Step 2 it might need re-sizing.
Go to Edit > Free Transform or Press the CTRL+T keys at the same time to bring up Free Transform
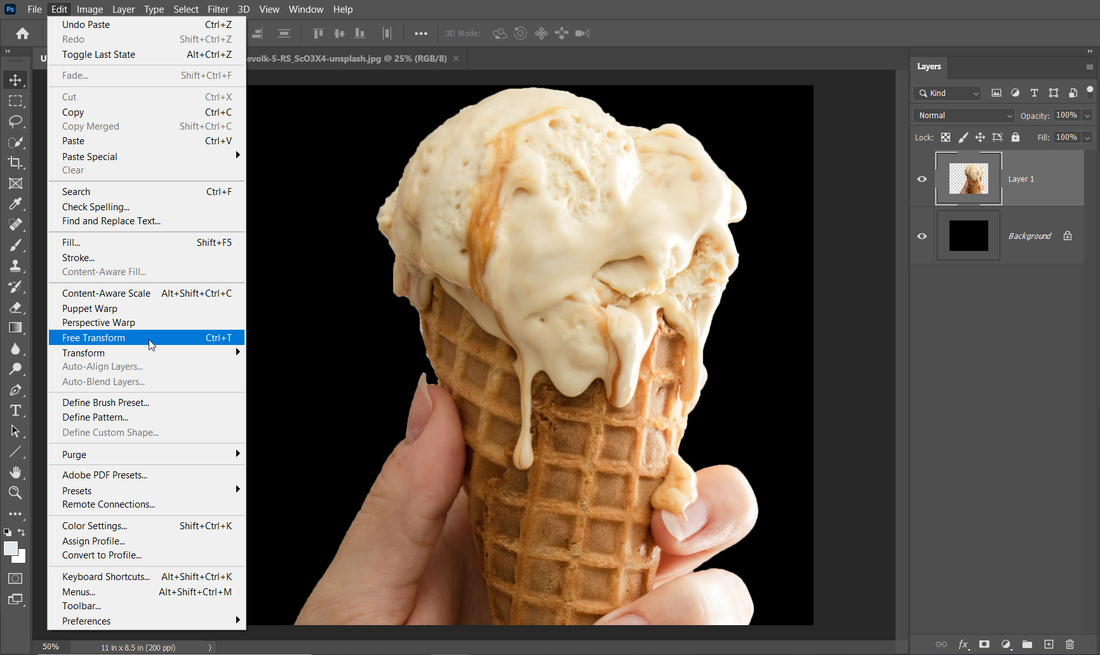
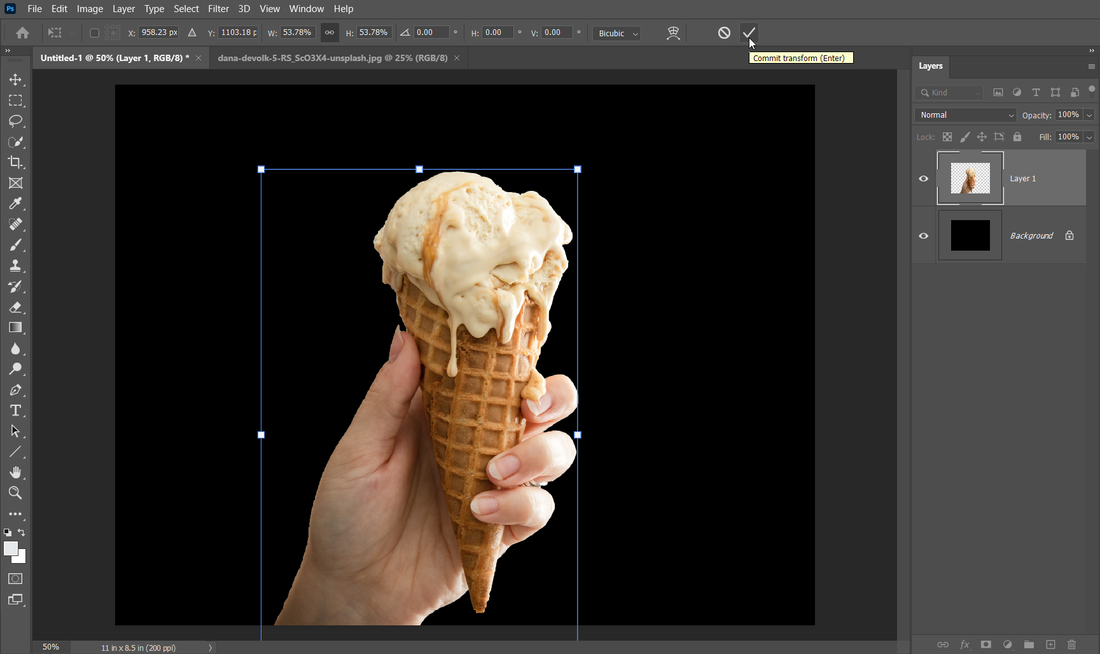
Click and hold the left mouse button and drag inward to make the photo smaller from the corner spots.
When you are happy with the new size click the Commit transform check mark in the Options Bar or the press the Enter key on the keyboard
When you are happy with the new size click the Commit transform check mark in the Options Bar or the press the Enter key on the keyboard
Step 5
Continue this process to complete your Personal Collage assignment with ALL your remaining photos that you saved.
Step 6 - Saving your Projects as a PSD (Photoshop) file
When you need to save your project do the following:
Save this as Personal Collage to your Google Drive > Digital Photography folder
Make sure to save it as a Photoshop PSD file or ALL your layers will combine into one!
Save this as Personal Collage to your Google Drive > Digital Photography folder
Make sure to save it as a Photoshop PSD file or ALL your layers will combine into one!
Step 7 - Saving your Projects as a JPEG or JPG (flatted layers) file
When you are COMPLETELY FINISHED with this project please submit the following FILE to Google Classroom for grading:
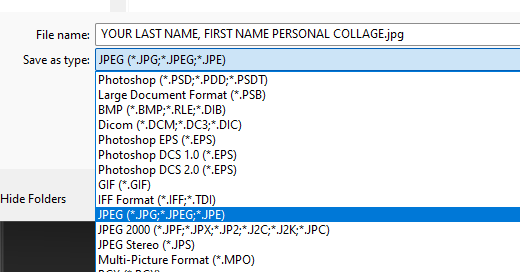
To do this go to the File Menu and select > Save a Copy in Adobe Photoshop
File Name - YOUR LAST NAME, FIRST NAME PERSONAL COLLAGE.JPG (DEMO will be given)
Change the SAVE AS TYPE to JPG
To do this go to the File Menu and select > Save a Copy in Adobe Photoshop
File Name - YOUR LAST NAME, FIRST NAME PERSONAL COLLAGE.JPG (DEMO will be given)
Change the SAVE AS TYPE to JPG
WORTH 100 Points
Bad example below
|
Student did not overlap photos or use SCALE or EMPHASIS from the PowerPoint slideshow on the Elements/Principles in Photography and the straight edges from the original images are visible in some photos. These should not be seen. See the Good Student Examples below.
|