Surrealism Photo Composite

|
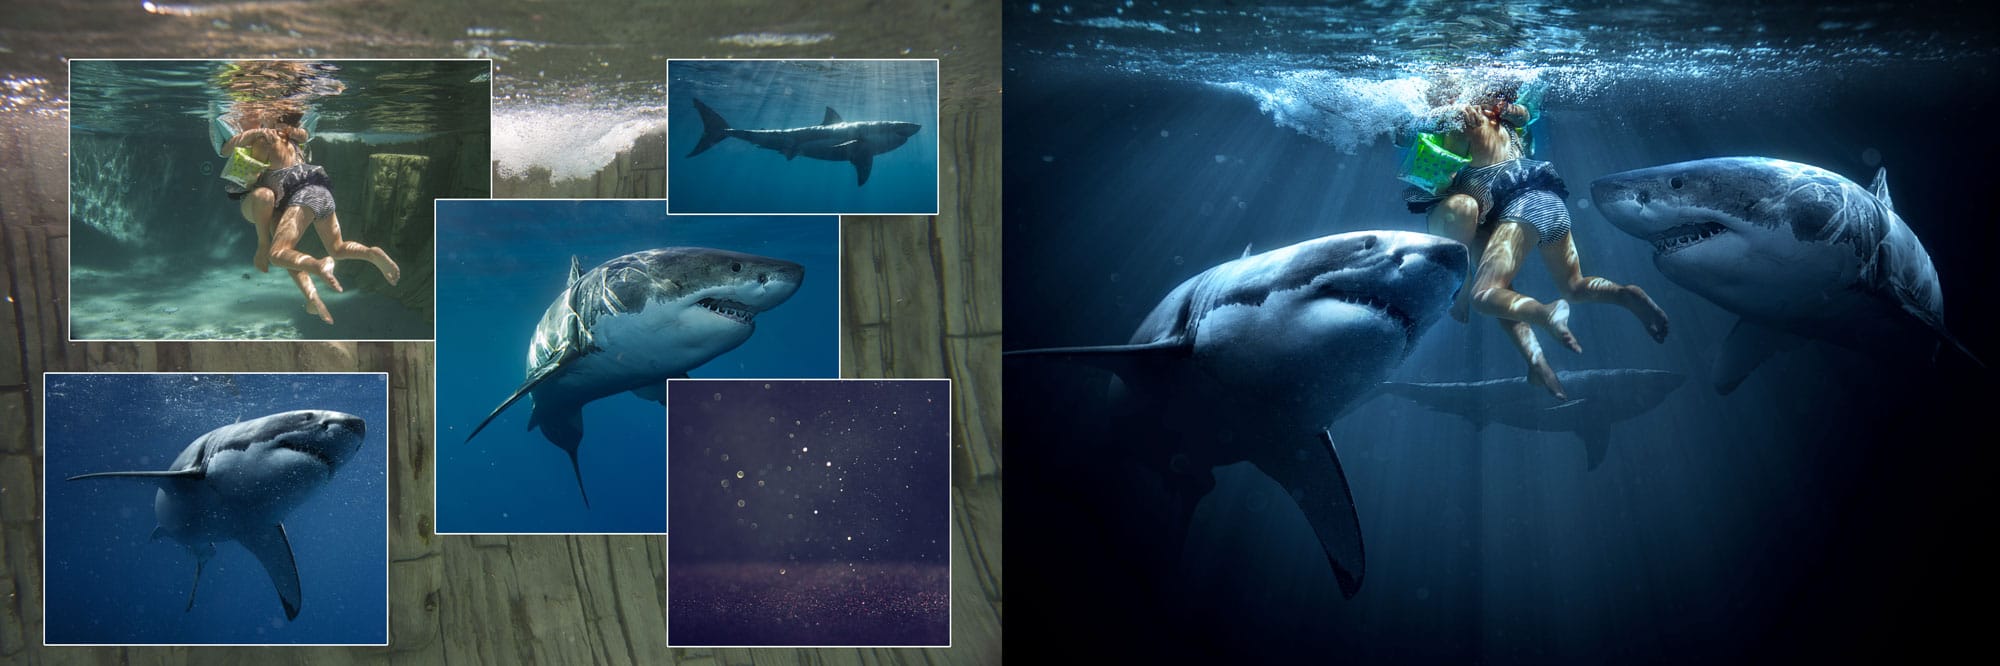
A photo composite is a combination of two or more photos together. In this photo composite your goal is to composite 3 or more photos together so the end result looks unrealistic, bizarre, not possible or surreal. Meaning it looks like realistic, but completely impossible.
Surrealism was a cultural movement that began in the early 1920s, and is best known for the visual artworks and writings of the group members. Today surrealism is no longer a movement but a type of art that a lot of artists like to use to express themselves, in this digital era surrealism is one of the top digital art styles. |
Photo Compositing: 7 Essentials of Visual Magic
Step 1
You MUST use https://unsplash.com/ or https://www.pexels.com/ to search, find and save the photos needed for this project.
Collect the photos needed to create the composite and developing ideas on how you are going to combine them. Think carefully about these photos.
Not all photos would work together well for this type of project. Pay attention to the lighting in the separate images when you select them. When different lighting is used in a composite it is a dead give away that it is fake. We are trying to make it appear that these images we both there when the photo was taken.
Step 2
Select the image from the background using these techniques:
Select Menu > Select Subject to make selections in your photos. Use the Refine Edge Command if needed to clean up the edges of the selection.
Use the Move tool to drag and drop one photo onto another one. You could also Copy & Paste images together.
They also might need to be adjusted in size or proportion using the Edit Menu > Free Transform (CTRL + T) tool.
Step 3
Adjusting the colors to match if needed
You may need to adjust the colors and contrast from the separate images to better match your new composite.
This can be accomplished using Adjustment Layers - Levels, Curves, or Hue & Saturation.
Adjusting the colors to match if needed
You may need to adjust the colors and contrast from the separate images to better match your new composite.
This can be accomplished using Adjustment Layers - Levels, Curves, or Hue & Saturation.
Step 4
Save this completed image as: Sureal Composite.psd to your Google Drive folder.
Save this completed image as: Sureal Composite.psd to your Google Drive folder.
Step 5
File Menu > Save a Copy
Save a copy of this completed image as a JPEG file: Surreal Composite.jpg to your Google Drive folder.
Turn in this file to this post on Google Classroom.
File Menu > Save a Copy
Save a copy of this completed image as a JPEG file: Surreal Composite.jpg to your Google Drive folder.
Turn in this file to this post on Google Classroom.
