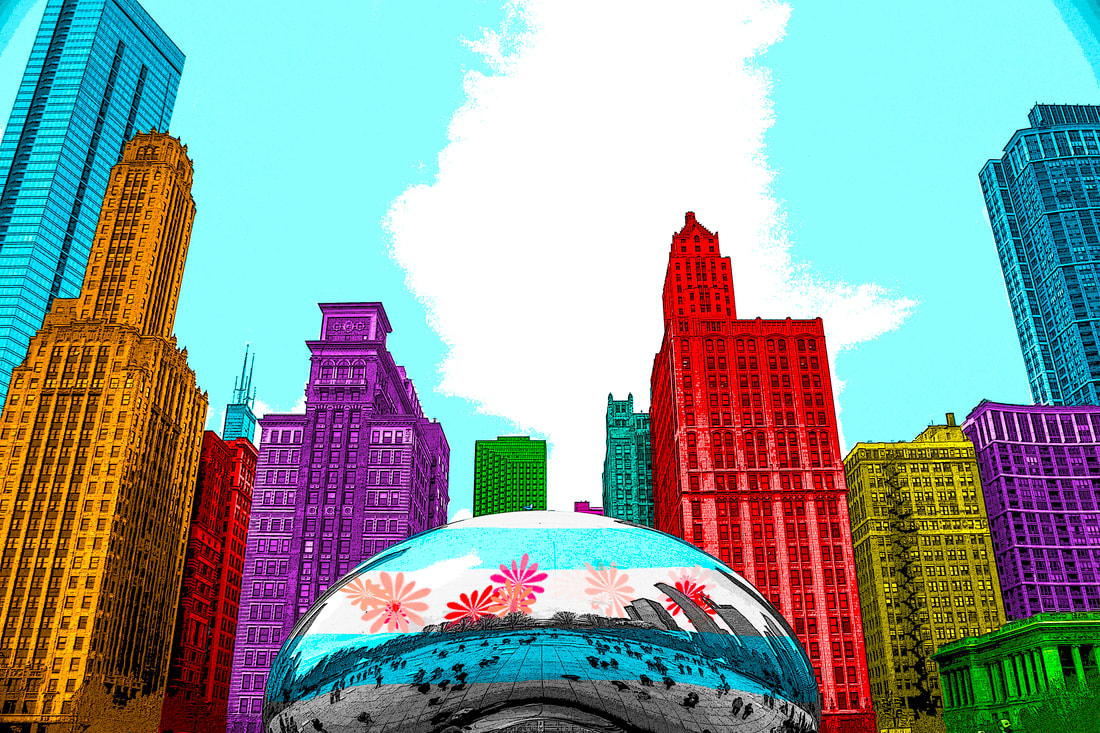
The City in Vivid Colors
|
Directions
Carefully paint different Vivid Colors (a minimum of 7) using the Brush Tool. Apply this paint on different layers above a black and white adjustment layer using a personal photo. Photos of cityscapes work very good for this assignment. The entire photo needs to be painted. More than 7 colors can be used if you choose. A specific Photoshop filter will also be applied to give the photo a graphic art effect. Step 1
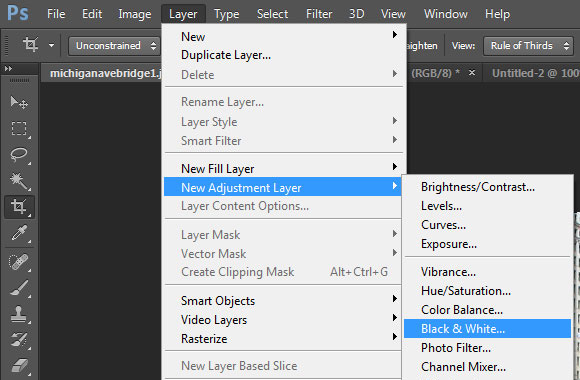
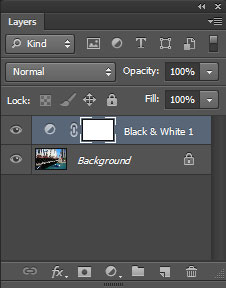
Open Photoshop, and the open up a photo you already have taken yourself or use one of the photos from this folder if you would like. The link to those photos is here: https://drive.google.com/drive/folders/1A-cFU4sjtEjEqomyXmy89hcrNtWprrtr?usp=sharing Step 2 Add an Adjustment Layer > Black and White above the color photo. |
|
|
Step 3
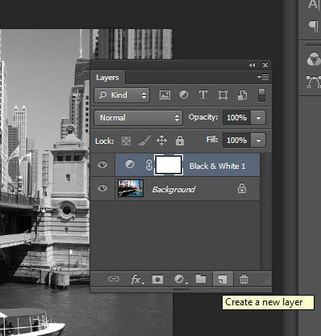
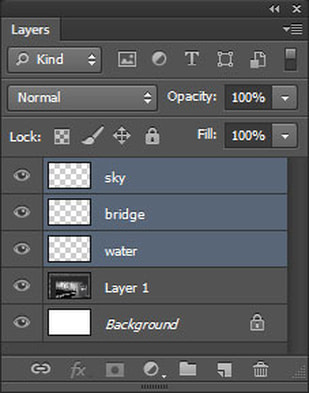
Add new blank layers above the background for all the different areas or sections and label these layers. Click on the new layer icon (see screenshot below) in the middle image
Add new blank layers above the background for all the different areas or sections and label these layers. Click on the new layer icon (see screenshot below) in the middle image
|
|
|
Step 4
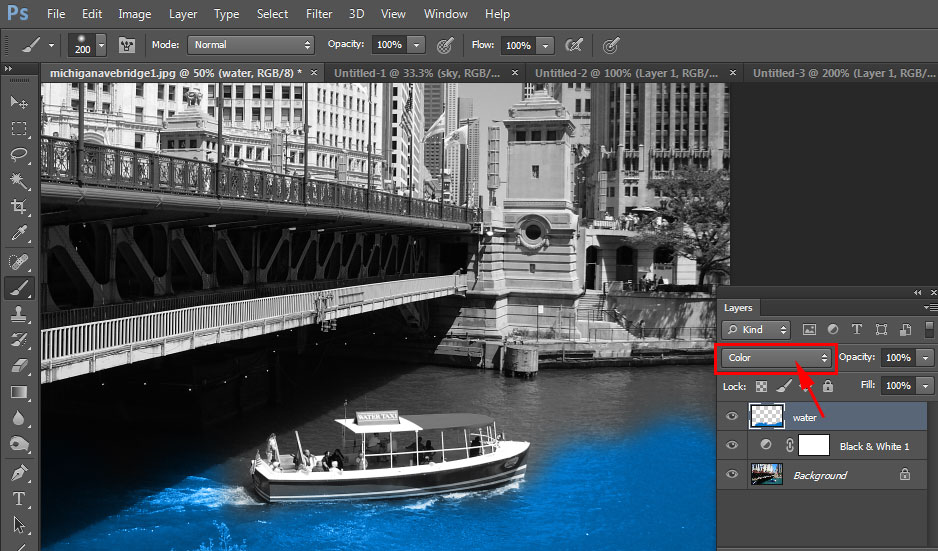
Change the Layer Blend mode of these layers to either Color, Overlay or Multiply so you can see the image below as you paint.
Change the Layer Blend mode of these layers to either Color, Overlay or Multiply so you can see the image below as you paint.
Step 5
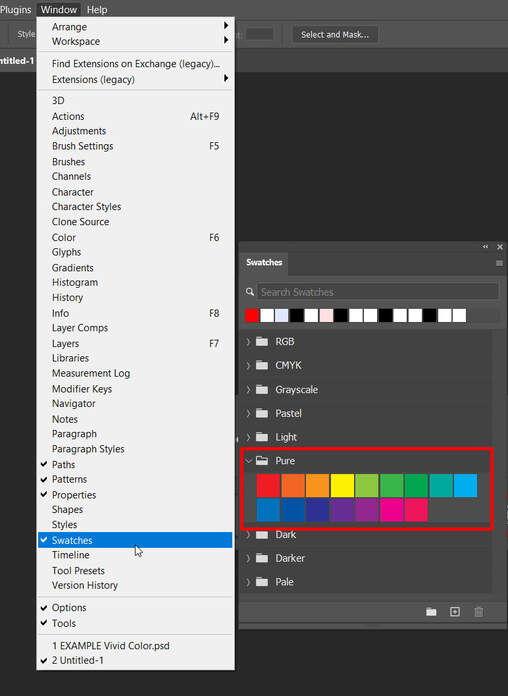
Select a VIVID and BRIGHT Color from the Window > Color Swatches palette. Try using the Pure swatch colors
Select a VIVID and BRIGHT Color from the Window > Color Swatches palette. Try using the Pure swatch colors
Step 6
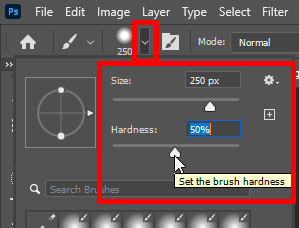
Use the Brush Tool with about 50% Brush Hardness and paint in these new Vivid Colors on the correct layer like the example above. Change the size of the brush bigger or smaller when needed. Zoom in close and paint in the areas carefully.
Craftsmanship (neatly done, no paint spilling out to other areas) is a big part your grade.

|
|
Step 7
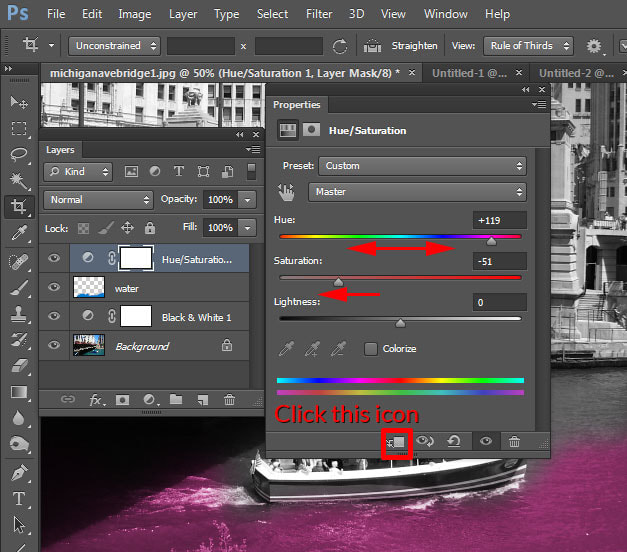
If you don't like the color after you paint in that area, it could be changed easily by going to Image > Adjustment > Hue/Saturation
Drag the Hue slider to the right or left and click on the Clipping Icon to make sure the color only is applied to that specific layer
If you don't like the color after you paint in that area, it could be changed easily by going to Image > Adjustment > Hue/Saturation
Drag the Hue slider to the right or left and click on the Clipping Icon to make sure the color only is applied to that specific layer
Step 8
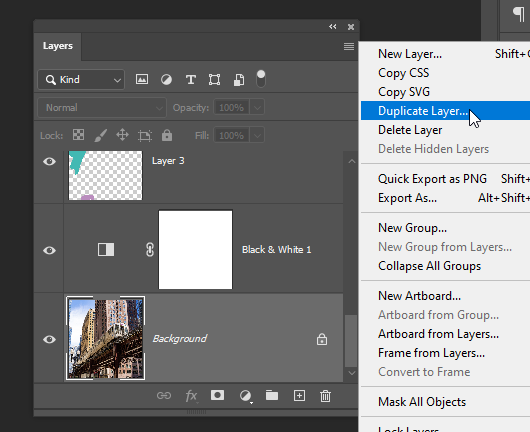
When all the colors have been added, duplicate the background layer. Select this layer first by clicking on it, and then select Duplicate Layer from the Flyout Menu (horizontal lines) at the top right of the Layer Panel.
When all the colors have been added, duplicate the background layer. Select this layer first by clicking on it, and then select Duplicate Layer from the Flyout Menu (horizontal lines) at the top right of the Layer Panel.
Step 9
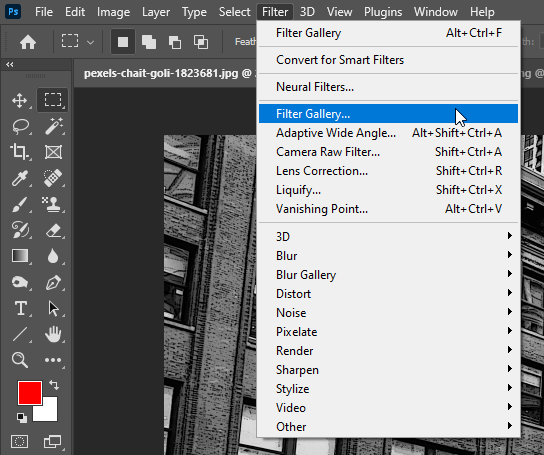
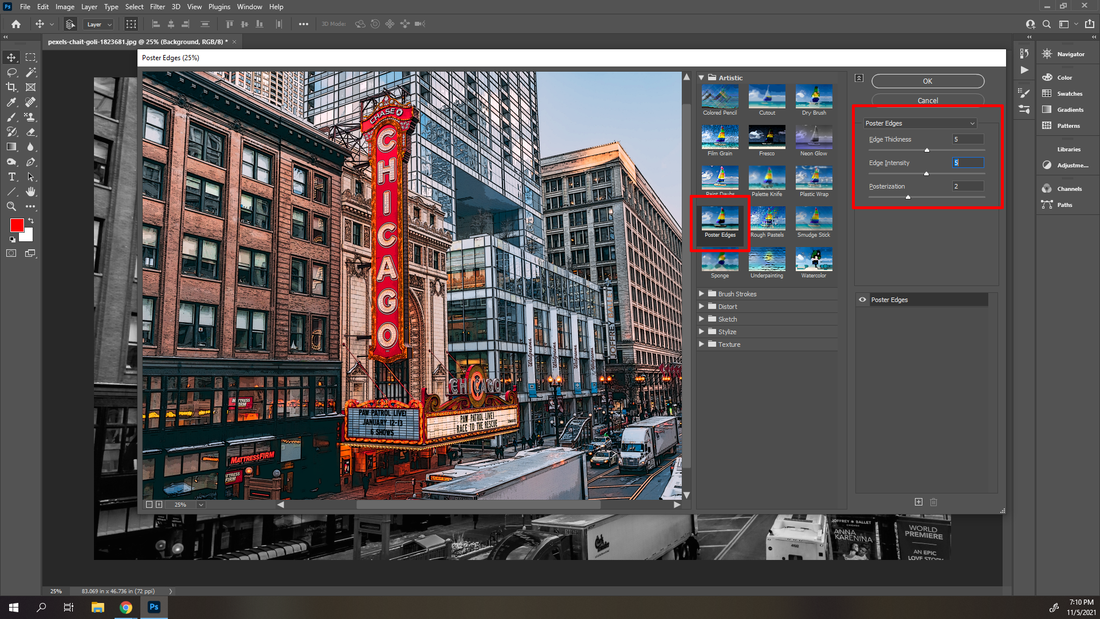
Then apply the Filter > Filter Gallery > Artistic > Poster Edges with the settings shown below
Then apply the Filter > Filter Gallery > Artistic > Poster Edges with the settings shown below
|
Edge Thickness 5
Edge Intensity 5 Posterization 2 |
Step 10
Save this on your Google Drive as Chicago Vivid Colors.psd
Then, go to File > Save a Copy and save this as a JPG file to your Google Drive as well. Chicago Vivid Colors.JPG
Save this on your Google Drive as Chicago Vivid Colors.psd
Then, go to File > Save a Copy and save this as a JPG file to your Google Drive as well. Chicago Vivid Colors.JPG
