Chicago Vivid Colors
|
Directions
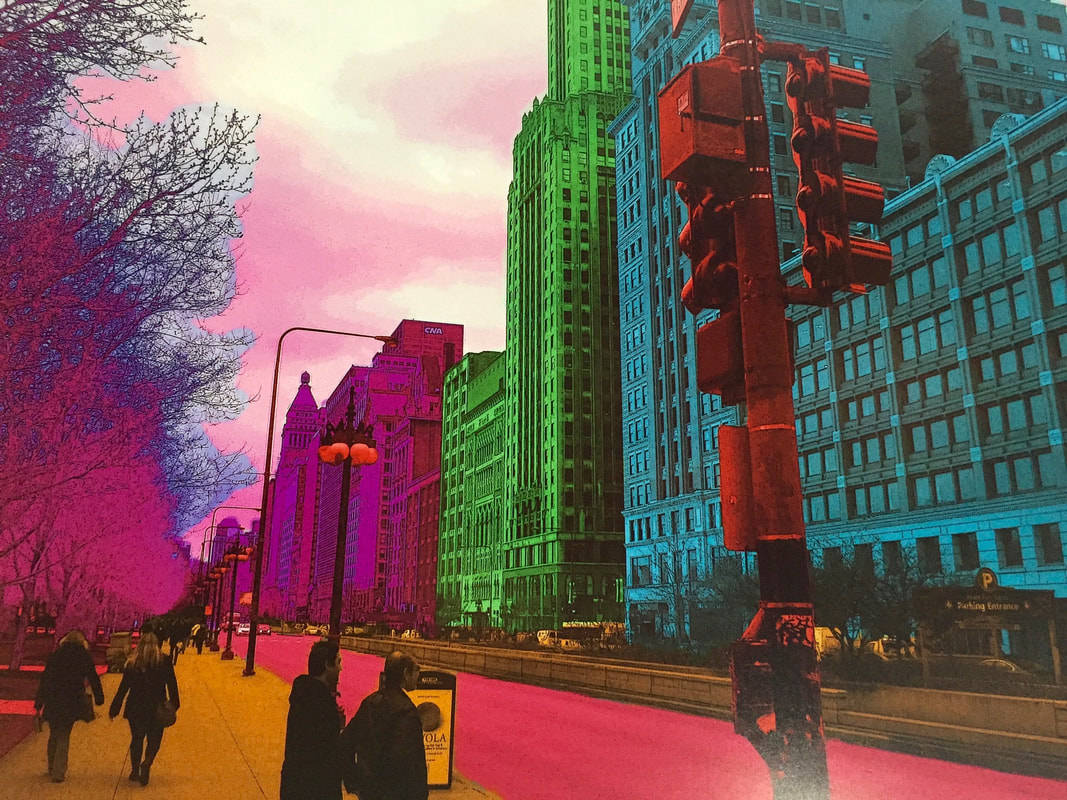
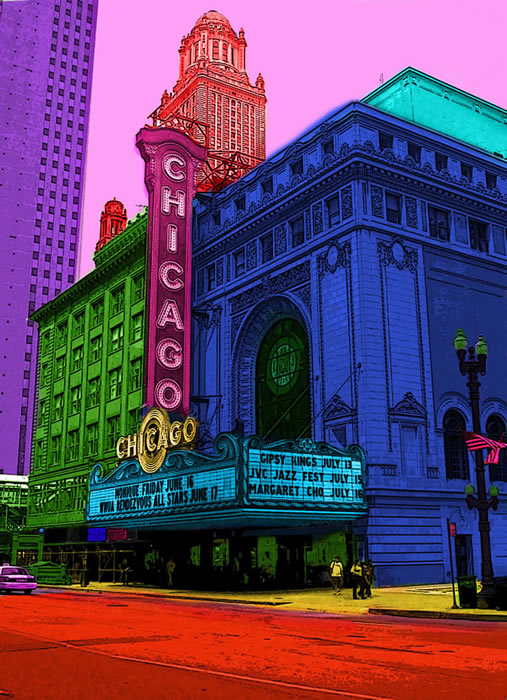
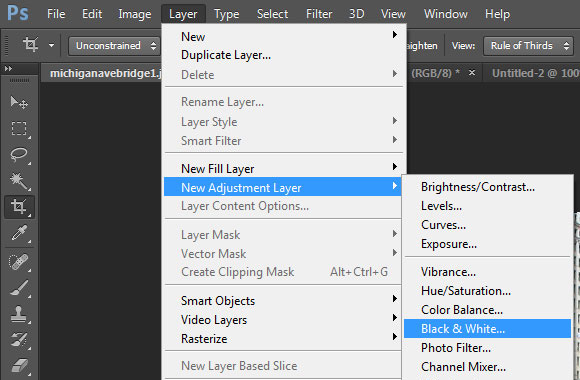
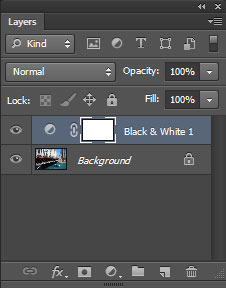
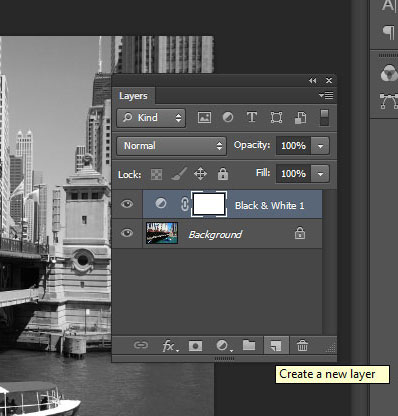
Selectively paint different vivid colors (at least 7) using the Paintbrush Tool on may different layers above the black and white image using one of your field trip photos from Chicago. The entire photo needs to be painted. Repeat colors if needed or use more than 7. Step 1 Open Photoshop, and the open up a photo from our field trip to Chicago you already have saved. NOTE: If you did not go the field trip to Chicago, photos must be taken from the Advanced Search on Flickr - Search: Chicago Step 2 Add an Adjustment Layer > Black and White above the color photo. |
|
|
Step 3
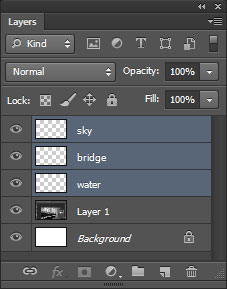
Add new blank layers above the background for all the different areas or sections and label these layers.
Add new blank layers above the background for all the different areas or sections and label these layers.
|
|
Step 4
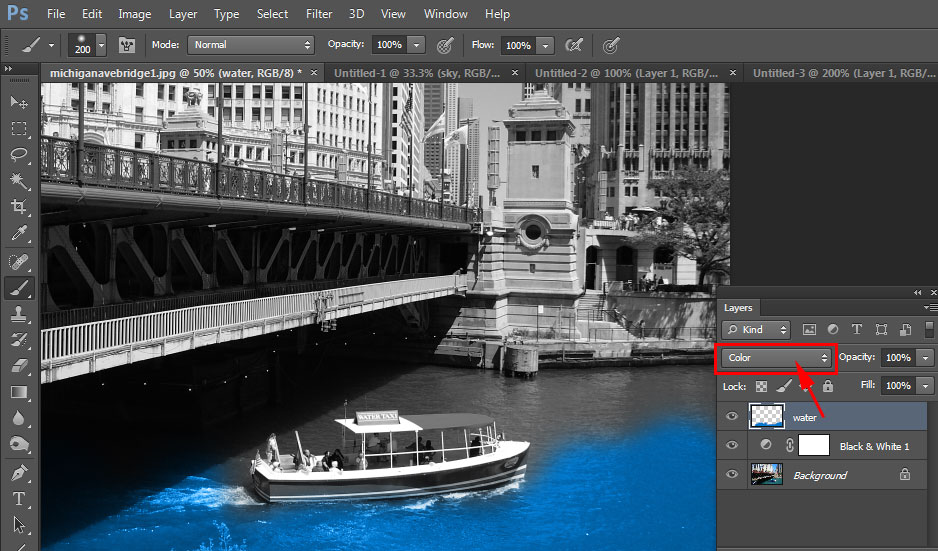
Change the Layer Blend mode of these paint layers to either Color, Overlay or Multiply so you can see the image below.
Change the Layer Blend mode of these paint layers to either Color, Overlay or Multiply so you can see the image below.
Step 5
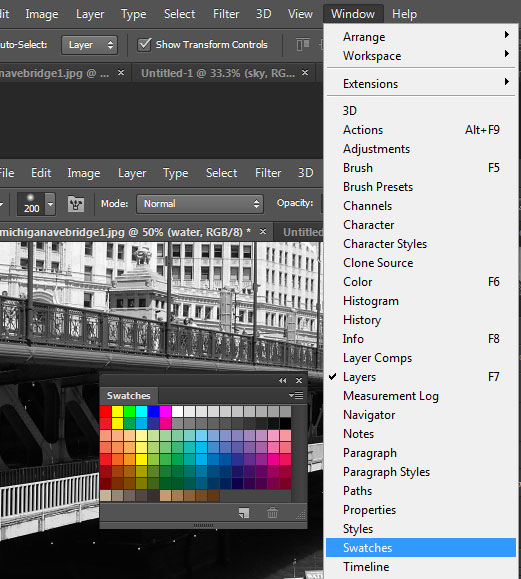
Select a color either in the Foreground Color tools, Color Picker, or Color Swatches palette
Select a color either in the Foreground Color tools, Color Picker, or Color Swatches palette
Step 6
Use the Paintbush Tool with 50% brush hardness and paint in these new Vivid Colors on the correct layer like the example above. Change the size of the brush or zoom in when needed.
I would highly recommend using the Wacom Pen and tablet for this project.
Use the Paintbush Tool with 50% brush hardness and paint in these new Vivid Colors on the correct layer like the example above. Change the size of the brush or zoom in when needed.
I would highly recommend using the Wacom Pen and tablet for this project.
Step 7
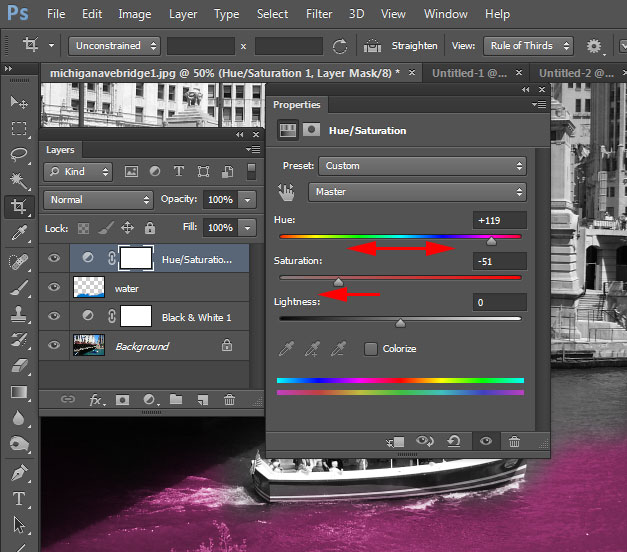
If you don't like the color after you paint in that area, it could be changed easily by going to Image > Adjustment > Hue/Saturation and dragging the Hue slider to the right or left.
If you don't like the color after you paint in that area, it could be changed easily by going to Image > Adjustment > Hue/Saturation and dragging the Hue slider to the right or left.
Step 8
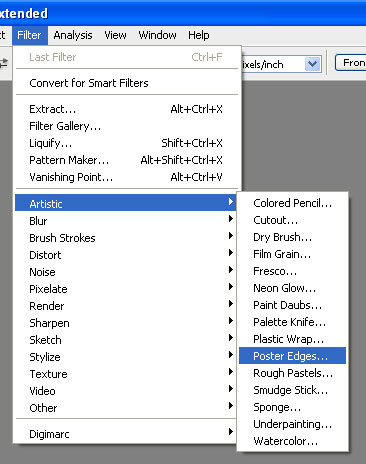
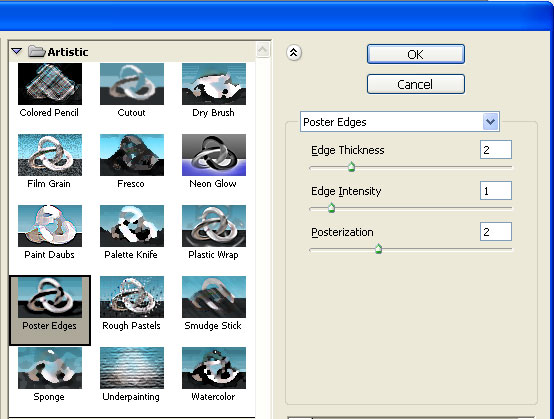
When all the colors have been added, duplicate the background layer (CTRL + J). Then apply the Filter > Artistic > Poster Edges.
When all the colors have been added, duplicate the background layer (CTRL + J). Then apply the Filter > Artistic > Poster Edges.
|
|
Step 9
Save this on your Google drive as ChicagoVividColors.psd.
Now save this as a JPG file as well.
File Menu > Save as > ChicagoVividColors.jpg to your Google Drive folder.
Step 10
Turn in the ChicagoVividColors.psd file and the ChicagoVividColors.jpg into Google Classroom.
WORTH 100 Points
Save this on your Google drive as ChicagoVividColors.psd.
Now save this as a JPG file as well.
File Menu > Save as > ChicagoVividColors.jpg to your Google Drive folder.
Step 10
Turn in the ChicagoVividColors.psd file and the ChicagoVividColors.jpg into Google Classroom.
WORTH 100 Points
